


32Pcs incubator Box Egg incubator Digital 12V/110V Dual Voltage incubator Poultry Hatcher
$129.59
Shipping:Standard Shipping about 10-25 business days
Secure Payment:Paypal,VISA,MasterCard
Package Included
2 x Water bags
1 x Incubator
1 x Cotton Pad
1 x Sprinkle Bottle
1 x 12V Cable
1 x 110V Cable
Specifications
Materials:PP Plastic
Manchine input voltage:DC 12V±10%
Power Adapter input voltage:AC110V±10% 50HZ
Output voltage:DC 12V±10% 2A
Temperature measurement accuracy:±0.1℃
Environmental humidity:≤85%RH
Environmental temperature:-10℃-38℃
Features
–Fall and high temperature-resistance material
–Transparent case with self-contained egg candler for easier observation.
— Ventilation holes on both sides, increasing the amount of oxygen in the tank, high hatching rate.
— Multi-type egg hatching:eggs, duck eggs, goose eggs, bird eggs, ect.
Operation Steps
1. Power on test.
2. Put one plastic bag into the other plastic, then pour water (preferably around 30 degrees) into
the plastic bag and Lay the plastic bag at the bottom of the box.
3. Put the temperature probe to the surface of the plastic bag with tape (must be placed on the upper surface).
4. Start testing the machine and wait for the temperature to be stable before calibrating the thermometer.
5. The water bottle is filled with water and placed in the machine to keep the water temperature of the kettle
consistent with the temperature of the hatching eggs.
6. Put the hatching eggs after disinfection and put them directly on the plastic bag.
7. Put a small quilt on the hatching eggs and cover the hatching eggs tightly.
8. Spray Water Three days before shelling, spray 2~3 times a day; spray twice each time.
Note:Do not cover airtight things, such as plastic sheets, etc., the original packaging foam cover can not be used when hatching.
Warning
* Be sure to test whether the water bag is leaking, or it may cause a short circuit.
* After putting the hatching eggs on the plastic, put a small quilt, not too loose or too tight, you must
ensure that there is sufficient oxygen in the incubator.
* The default temperature is 37.8 ° C, and the number of eggs can be hatched at the same temperature regardless
of the number of eggs(the incubator can contain 32pcs eggs.).
* Egg hatching time is 19-23 days; different egg types have different hatching time.
* During the hatching period, in addition to the need to turn the eggs, you need to spray water three days before
the shelling, spray 2-3 times a day, two times each time.
Operation Instruction
Temperature setting
In the normal display state, short press the “SET Inch button, Flashing number on the screen is
the current machine setting temperature, press “+ Inch or “- Inch at this time.
Press the button to adjust to the needed temperature, and then press the “SET Inch button.
The machine will automatically save and exit the setting interface.
Egg candling operation
Press the inchEgg Candlinginch button to release, then the control panel will open the egg candling lamp;
place the hatching eggs in the egg candling hole to observe; after observing,
Press the inchEgg Candlinginch button to turn off egg candling lamp.
Temperature calibration settings
In the normal display state, long press the inchSETinch button until the screen displays PO,
immediately release the hand, pressing the inchSETinch button again, the screen displays 0.0.
And the corresponding inch+inch or inch-inch is adjusted at this time.
For example, if the machine displays temperature is 37.8℃ and the thermometer temperature is 37.0℃,
P0 is adjusted to -0.8℃ by inch-inch.
Quickly restore factory settings
Hold down the inch+inch and inch-inch keys together and do not raise your hand (about 5 seconds).
At this time, the buzzer will beep and the screen will flash once to indicate that
the control board is successful. Restore all factory default data (including previously calibrated temperature).
Note
1.Please allow 1-2cm errors due to manual measurement.
2.Due to the difference between different monitors, the pictures may not reflect the actual color of the item.
| Weight | 0.767 kg |
|---|
Related products
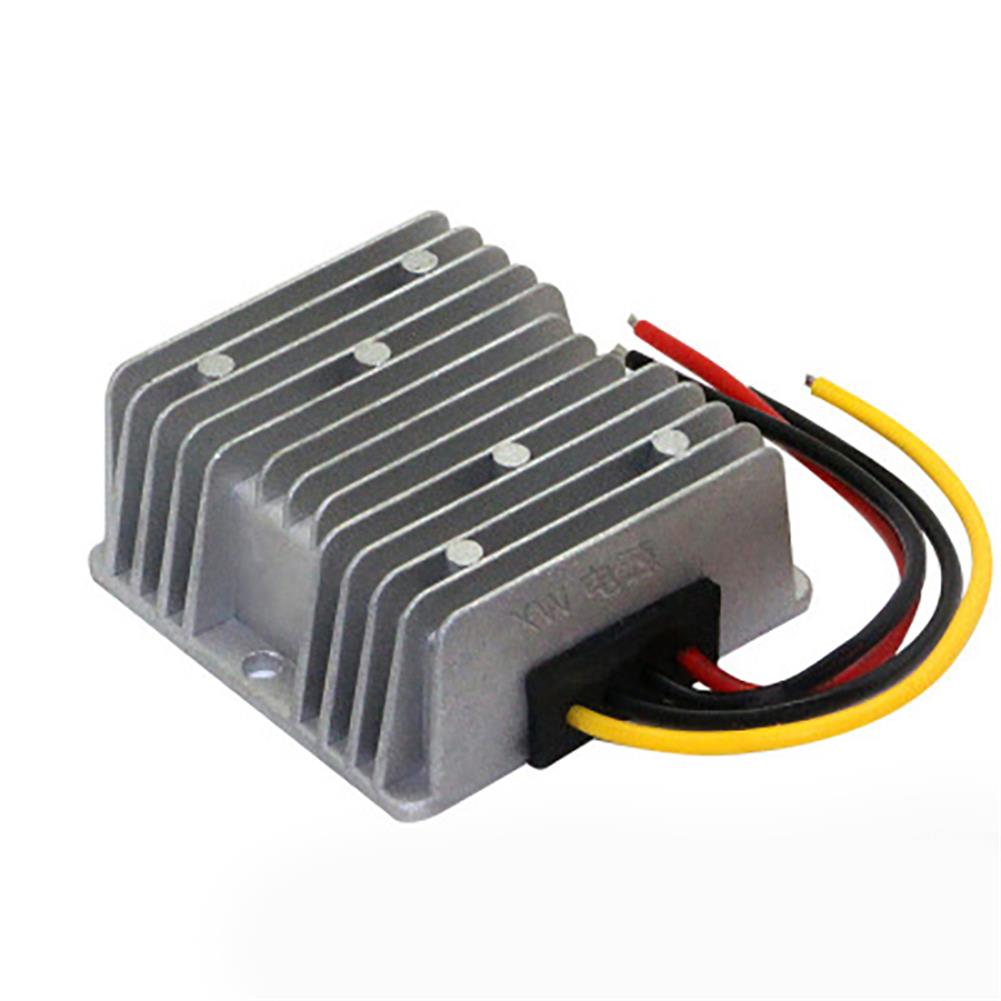
24V To 12V 20A 240W Waterproof DC/DC Voltage Converter Regulator Transformer Power Adapter
$50.61Switch AccessoriesAdd to cartWaterproof DC/DC Converter Regulator 24V Step Down To 12V 20A 240W SpecificationsModel:XW-24-12-240WMaterial:MetalSize:74*74*32mmInput voltage:DC 24V Output voltage:DC 12V Output current:20A MAX 25AOutput power:240WPitch of holes:65mmHole Diameter:5mmInstallation line length:13-14cmConversion efficiency:>93%Working temperature:-40℃~+85℃Protective function:overload protection, high voltage protection, over temperature protection, short circuit protection.Waterproof level:IP67Package included1 X DC/DC Converter Regulator
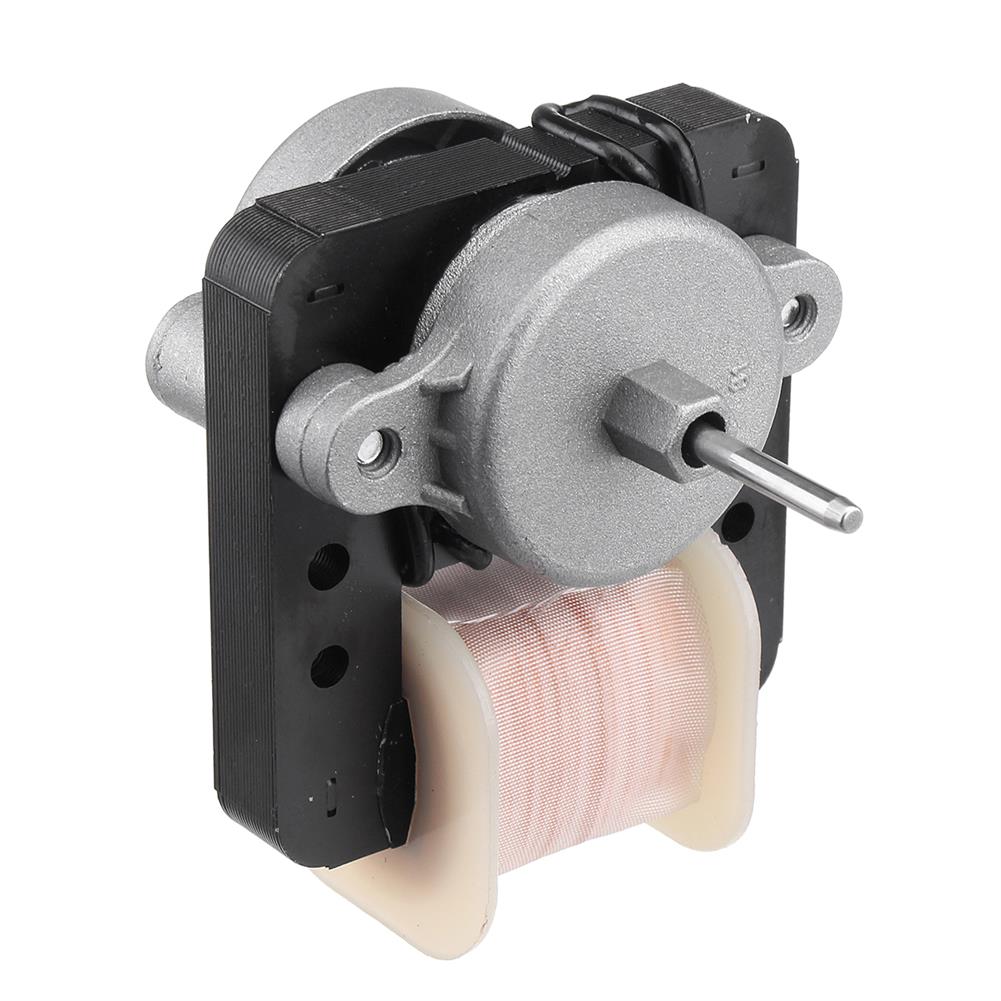
MATCC W10189703 Refrigerator Evaporator Fan Motor for Whirlpool Kenmore Sears Maytag
$62.76Switch AccessoriesAdd to cartW10189703 Refrigerator Evaporator Fan Motor For Whirlpool Kenmore Sears MaytagSpecificationProduct Name:Refrigerator Evaporator Fan MotorMaterial:MetalColor:Silver+BlackSize:6cm*4cm (L*W)Type:MotorModel:W10189703Manufacturer Part Number:W10189703Quantity:1pcReplaces these part numbersAP4364011, 2214986, 10449505, 10449506, 1469124, AH2341874, EA2341874, PS2341874, W102081212201213, 2201913, 2219647, 2219660, 2221893, 2262070, 2319208, 4389146, 2197381, 2197443,2188848(Please Compare The Part Number With Your Original One Before Purchasing!)Brands:For Admiral, Amana, Crosley, Estate, Jenn-Air, Kenmore,Sears, Kirkland, Kitchen …
MATCC W10189703 Refrigerator Evaporator Fan Motor for Whirlpool Kenmore Sears MaytagRead More
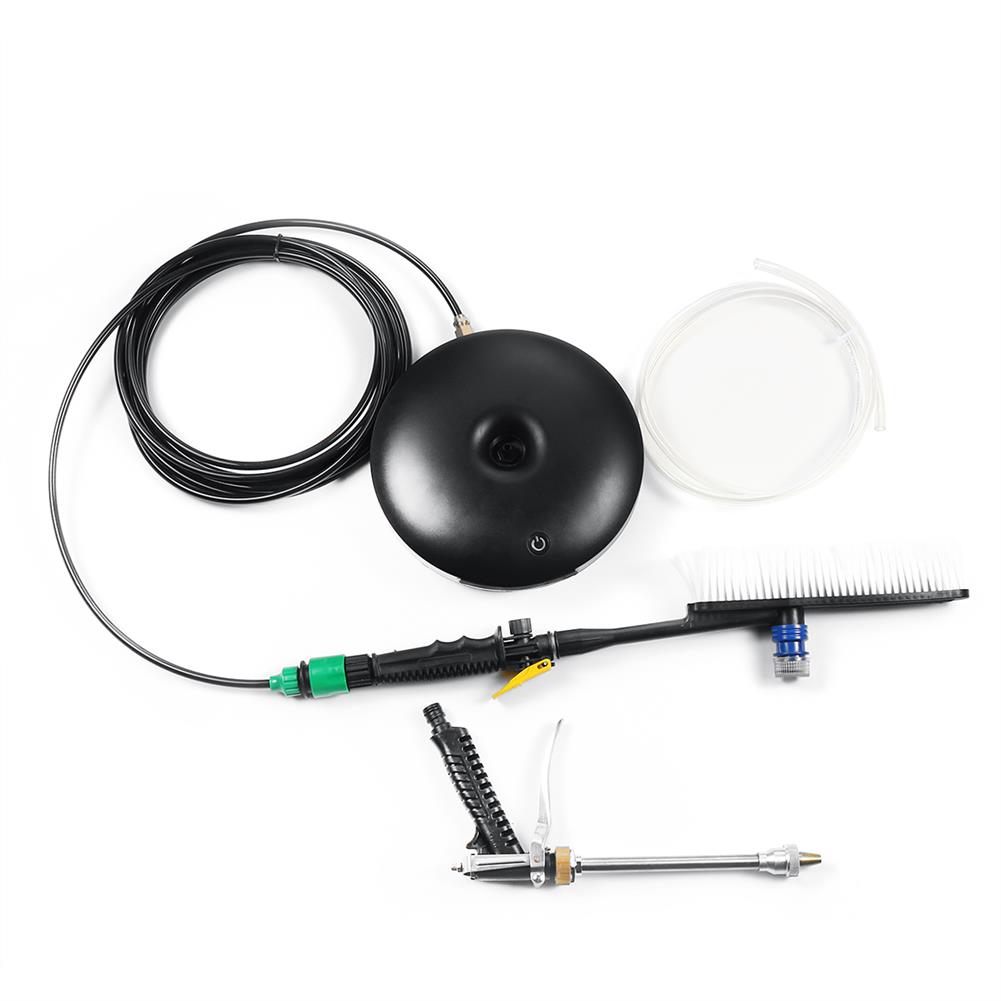
High Pressure Washer Ci-garette Energize Protable Water G un Mini Washing Machine
$190.34Switch AccessoriesAdd to cartSpecificationsName:High Pressure WasherModel:B38883Color:blackMaterials:ABS plasticVoltage:12V 2AMax Power:60WMax Water Pressure:0.65MpaWater Flow:0.2-2L/minCharging Time:10hWorking Time:1.2hFeatures-One-button start, booster pump head, deep waterproof.-The emergency power interface can be used for both car wash and charging.-The microcomputer-controlled supports direct screwing of the water bottle directly onto the water inlet.-It is also possible to insert water pipes and buckets directly, which is energy …
High Pressure Washer Ci-garette Energize Protable Water G un Mini Washing MachineRead More

Customers Also Viewed
5Pcs CP2102 USB To TTL/Serial Module Downloader
$21.98Converter BoardAdd to cart5Pcs CJMCU CP2102 USB To TTL/Serial Module UART STC Downloader For Driver Installation Introduction:http://forum.hobbyant.com/forum-topic-56275.html Description CJMCU-CP2102 its highly integrated, built-in USB2.0 full-speed function controller, USB transceiver, crystal oscillator, EEPROM and asynchronous serial data bus (UART), supports full-featured modem signal without any external USB devices. CJMCU-CP2102 works with other USB-UART adapter circuit similar to the driver …
10pcs 180 Degree USB 3.0 Type A female Socket Connector SMT Charging Socket Plug Connector
$10.11Terminal BlocksAdd to cartSpecificationsColorBlueRated Current1.5ARated Voltage30VInsertion Force35N MaxDurability3000 Cycles Min Rubber CorePBT / Icp Ul94V-0 Resistance To Voltage500V Ac Min. Insulation Resistance≥1000MΩPull-Out Force10N Min.Initial 8-20N AfterWorking Temperature-20 Degrees To 60 Degrees Contact Impedance≤30mΩTerminalsBrass C2680,Nickel Base,Gold-Plated 1 u,Package included-10pcs X 180Degree Connectors
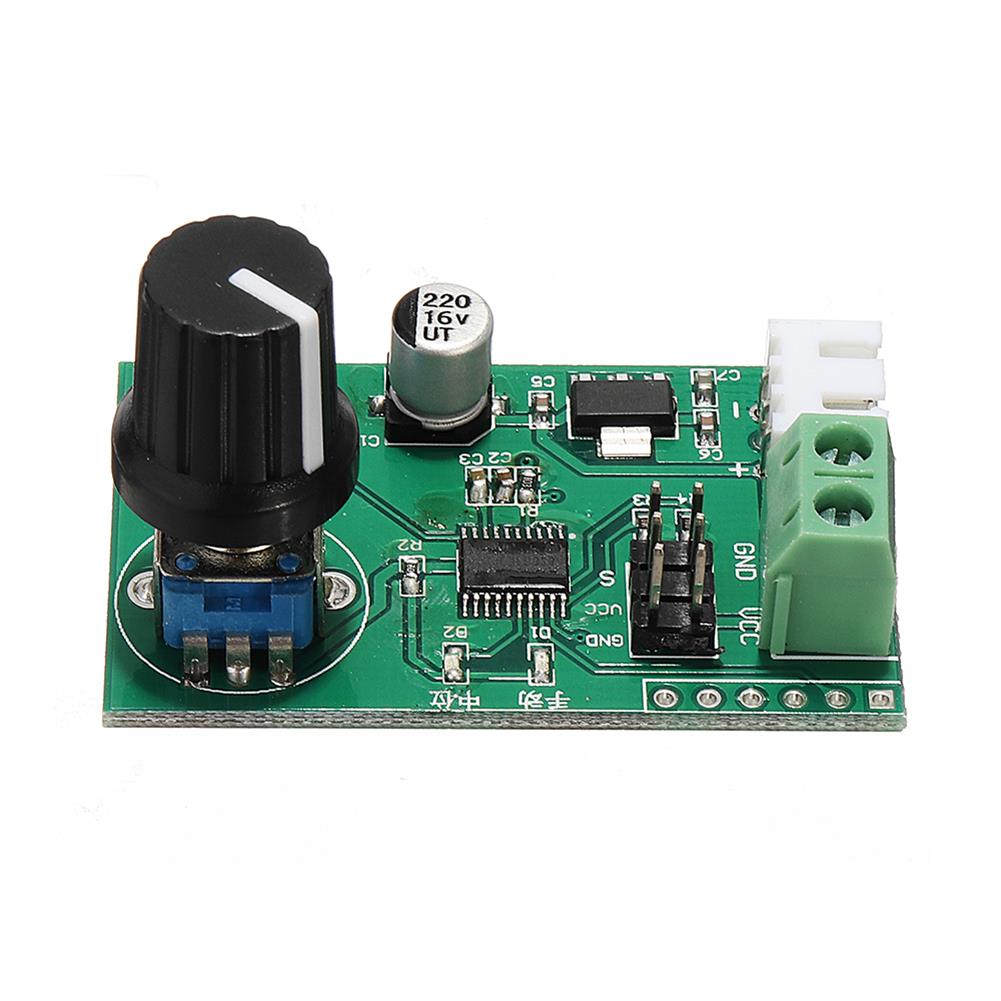
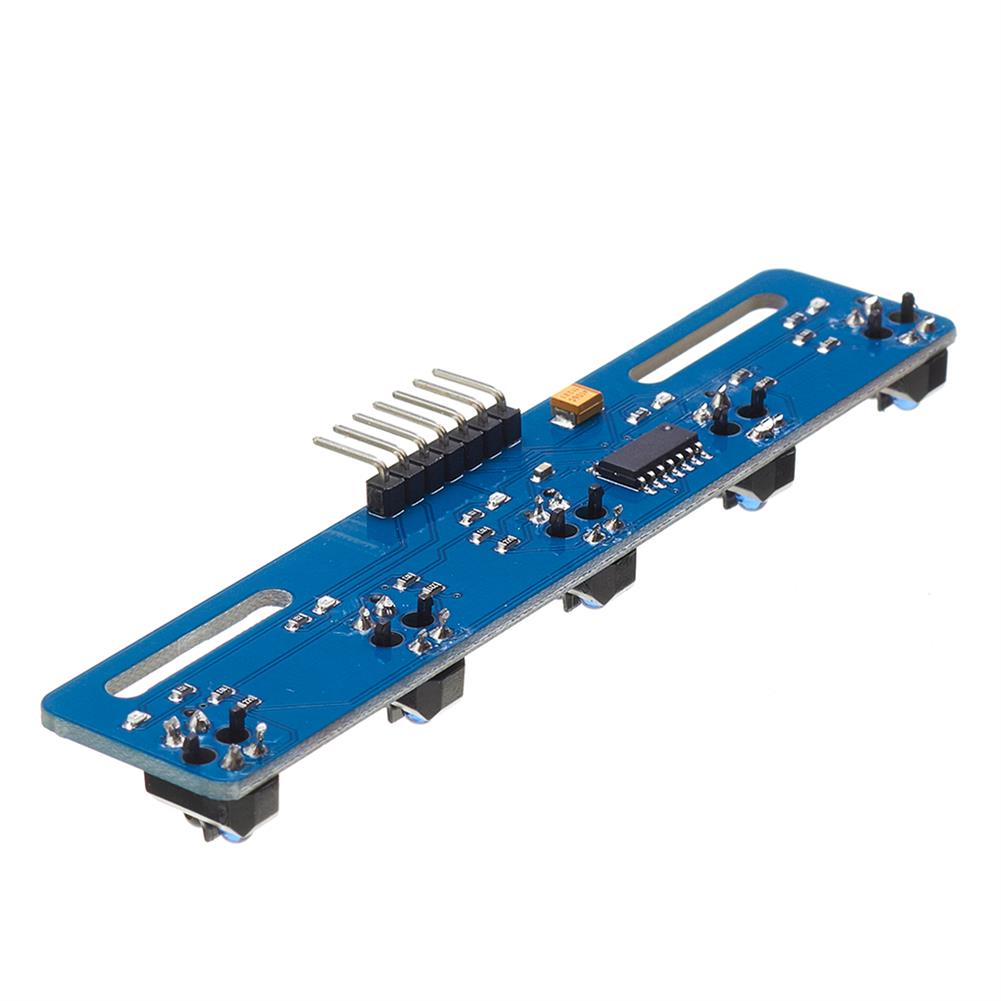
Dual Servos Knob Serial Port Control Board Futaba MG995 SG90 Steering Gear Debugging Module
$13.11Other Module BoardAdd to cartFeature1. The onboard stable 8-bit MCU is used to generate high-resolution PWM signals with precise control.2. Support manual mode and return to medium mode, switch by button, with mode indicator.3. Support knob adjustment or serial command control in manual mode.4. The serial port command control can use the matching host computer software or connect to …
Dual Servos Knob Serial Port Control Board Futaba MG995 SG90 Steering Gear Debugging ModuleRead More
Keyes Brick Laser Head Sensor Module (pad hole) with Pin Header Board Digital Signal
$4.36Sensor & Detector ModuleAdd to cartDescriptionThis sensor is fully compatible with ARDUI NO single-chip microcomputer, and its connection port is also compatible with Arduino sensor expansion board. It is mainly composed of a laser head, which is composed of a light-emitting tube core, a condenser lens, and a copper adjustable sleeve. After connecting to the power supply, we directly input …
Keyes Brick Laser Head Sensor Module (pad hole) with Pin Header Board Digital SignalRead More
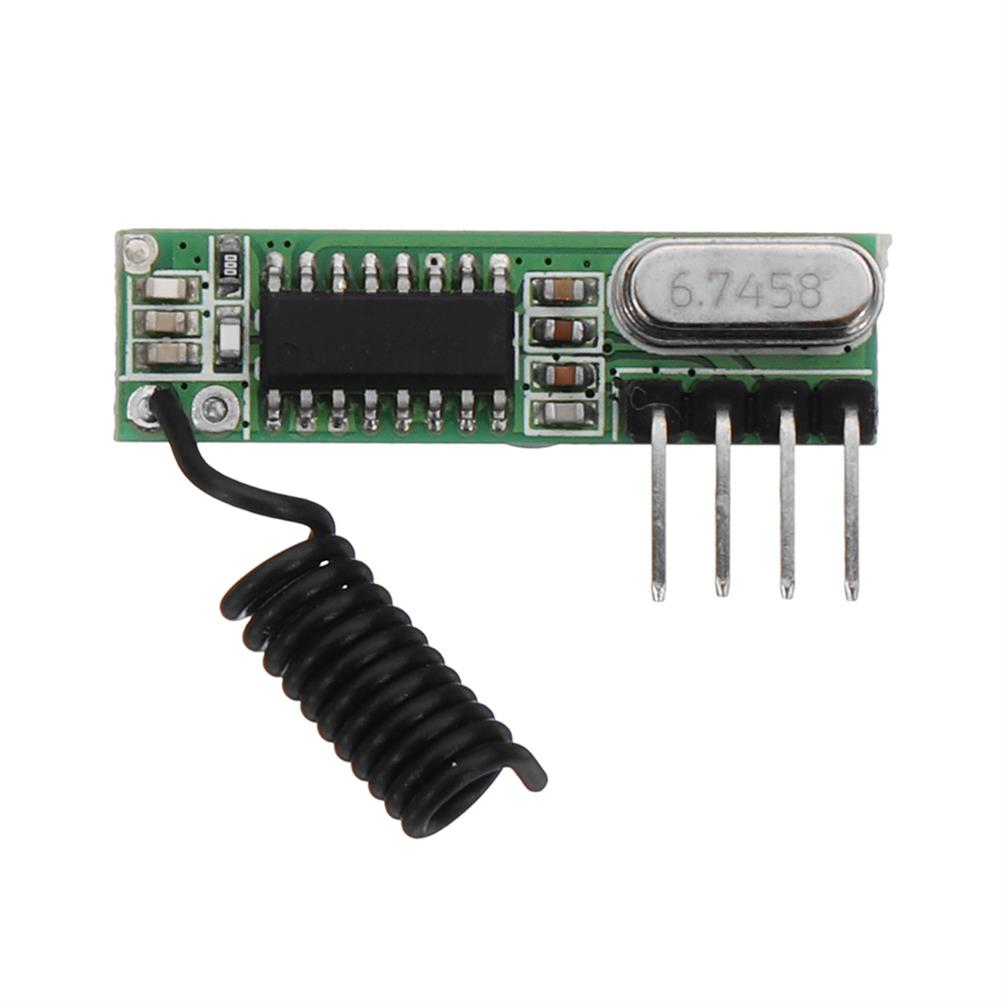
5pcs DC3~5V AK-119 433.92MHZ 4 Pin Superheterodyne Receiver Board without Decoding -105dBm
$10.37Other Module BoardAdd to cartFeatures1. The product is small in size, high in sensitivity and strong in anti-interference ability;2. The same definition as the four-pin pin of RXB12, the usage is the same. The unit price is lower than RXB12 and can be directly replaced.Technical ParametersWorking voltage:DC3~5VTransmission rate:4.80KBPSQuiescent current:6mAReceive sensitivity:-105dBmDimensions:30 * 9 * 5mmWorking temperature:-20 ° C ~ +80 …
5pcs DC3~5V AK-119 433.92MHZ 4 Pin Superheterodyne Receiver Board without Decoding -105dBmRead More
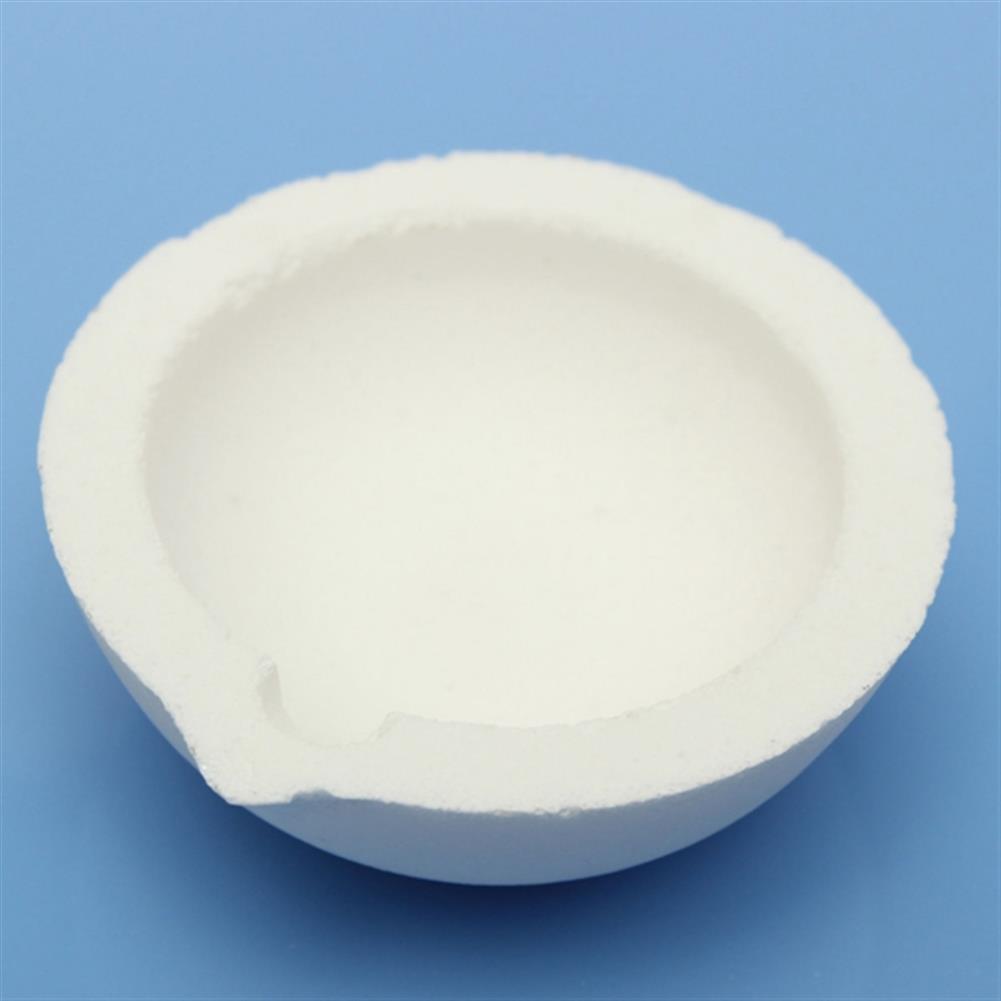
150g Capacity Quartz Silica Melting Crucible Pot for Gold Silver Platinum Refine
$16.19Glassware KitAdd to cart150g Capacity Quartz Silica Melting Crucible Pot For Gold Silver Platinum RefineDescriptionMaterial:quartzCapacity:150gDiameter:43X57mm/1.69inch X2.24inch(ID*OD)Height:20mm/0.79inchDeepth:15mm/0.59inchNet Weight:40gFeatureQuartz silica melting crucibleProduced by modern ceramic processing technologyHigh orrosion resistance and strength,the temperature resistance up to 2800℃/5072FPerfect for gold silver casting and refine usagePackage included1X Quartz Silica Melting Crucible
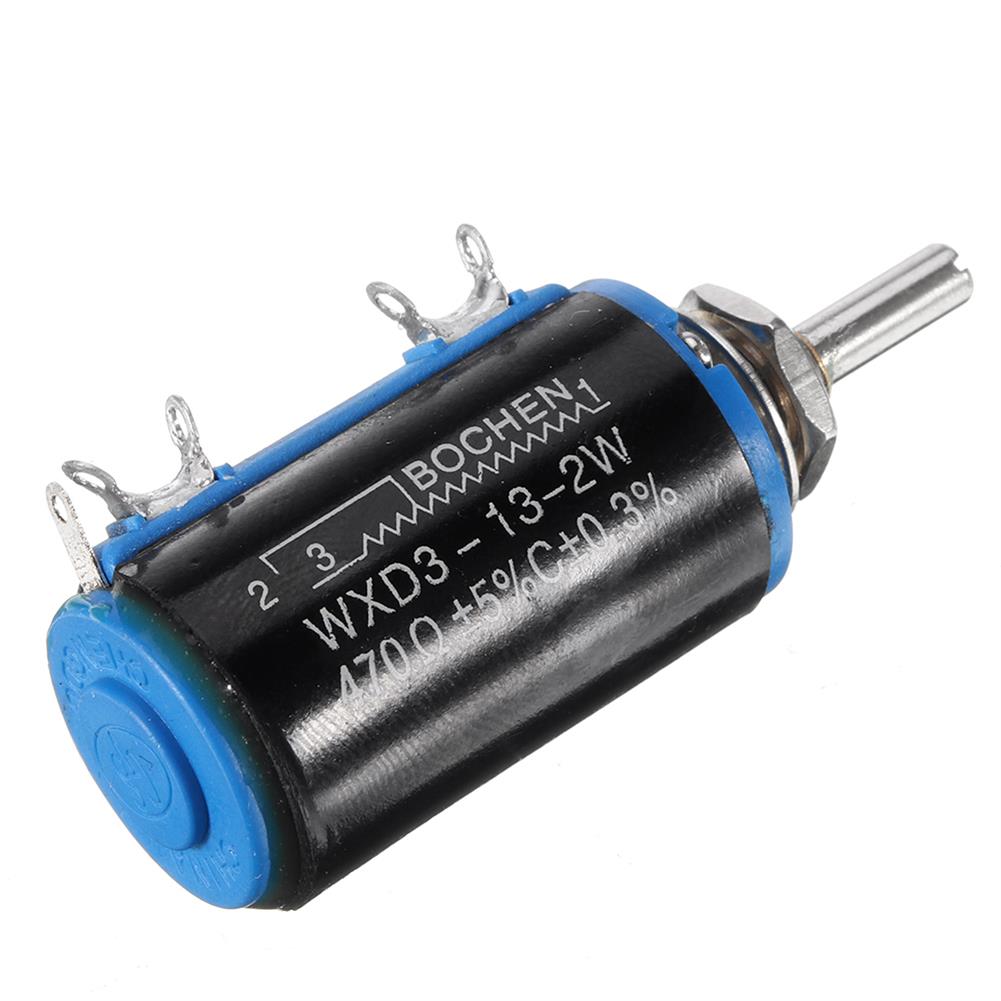
WXD3-13-2W Precision Potentiometer 470R 470 Ohm Wirewound Multi-Turn Potentiometer
$4.50Module ComponentsAdd to cartSpecificationsResistance range:470┯Resistance tolerance:÷ 5%Rotation angle:3600 ÷ 20 Number of laps:10 lapsRated voltage:160VStarting torque:3.5 ~ 100mN.mRated power:2W (85 →) 0W (125 →)Linearity accuracy:÷ 0.3%Mechanical durability:10,000 weeksPackage included1 x Potentiometer


Recently Viewed Products
-
 2pcs 70mm Clear Luggage Suitcase Replacement Rubber Wheel Roller Suitcase Repair Parts $28.34
 -
 NEMA L14-30C Locking Connector 30A 125V/250V 9KW 4 Pin $50.61
 -
 5 Channel infrared Reflective PIR Sensor Module TCRT5000 5 Way/Road IR Photoelectric Switch Barrier Line Track Module $8.73
 -
 2500mw Laser Engraving Machine DIY Laser Engraver Printer with Laser Module for Wood,Paper,Farbic,Leather Supporting Computer offline $551.48
 -
 3pcs 6mA 3-100CM Adjustable infrared Digital Obstacle Avoidance Sensor Module $20.45
 -
 LCD Automatic Watering Irrigation Timer Controller Garden intelligent Irrigation Sprinkler $97.19
 -
 M5Stack USB-TTL UART Serial Adapter Micro controller 6PIN Auto Downloader Type C USB $13.11
 -
 ZFX-W305 3Pcs AC-DC Power Supply Module input AC 100-240V Output 12V 3A 36W Converter Board $21.10
 -
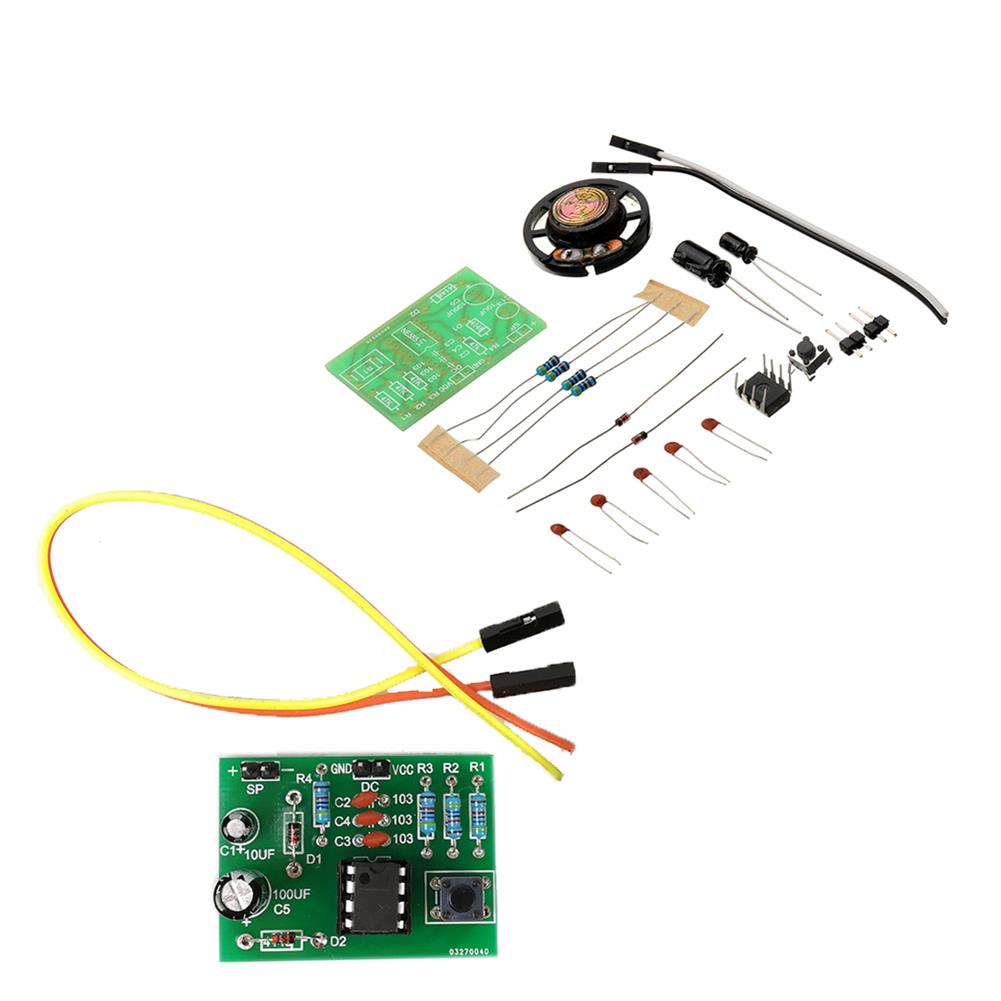 20pcs DIY NE555 Ding Dong Bell Doorbell Module Kit DIY Music DIY Electronic Production Training Kit $37.41
 -
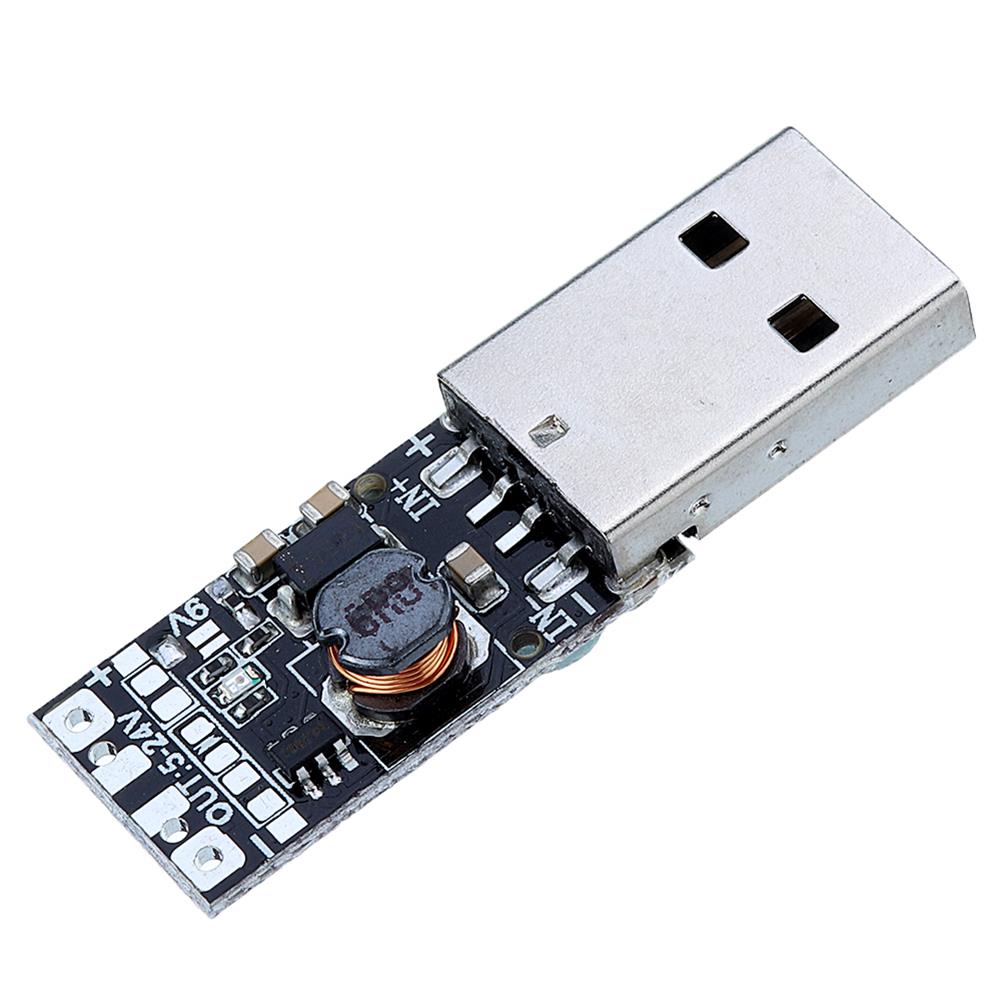 20Pcs DC 2-12V to 12V 9V 9W USB Boost Power Supply Module Step Up Module DC Converter $38.03
Reviews
There are no reviews yet.