


3pcs XH-W1321 0.1 Digital thermostat Mini Embedded Red Digital Display Switch Temperature Controller with Waterproof NTC Sensor Meter
$30.89
Shipping:Standard Shipping about 10-25 business days
Secure Payment:Paypal,VISA,MasterCard
Specifications
Product Name:Miniature embedded digital display thermostat
Product Model:XH-1321
Material:ABS
Case Color:White
LED Color:Red
Input Voltage:DC12V
Temperature Measurement Range:-50-110→
Temperature Control Range:-50-110→
Control Accuracy:0.1→
Display Accuracy:0.1→
Measuring Input:NTC10K Waterproof Probe L=1 Meter
Output Type:Relay Output(Output Switch)
Output Capacity:10A
Size (Length x Width x Height):about 56 x 38 x 32mm (2.17 x 1.50 x 1.26 Inch )
Opening hole size:46 x 34mm
Key Function
SET:Press once during normal use, directly enter the stop temperature setting state, use the up and down keys to set the required stop temperature, long press to enter the internal setting menu.
UP:After long press the setting button to enter the internal setting, increase the value setting by the up button.
DOWN:After long press the setting button to enter the internal setting, use the up button to decrease the value setting.
Code:Description:Setting range (method):Factory settings
P0:Operating mode:H/C:C
P1:Backlash setting:0.1-50:2
P2:Temperature correction:-9.9~+9.9°C:0
P3:Delayed start:0-9:0
Detailed Code Descriptions
P0:Working mode:This value must be set when the thermostat is used for the first time. If it is used for heating heating, set to H, if it is used for cooling cooling, set to C.
P1:Hypothesis setting:Press and hold the setting button for 3 seconds to enter the internal menu, select P1, and press the setting button again to enter the hysteresis value setting state. The hysteresis is the difference required when the thermostat reaches the set temperature and stops working again. For example, it is set to the heating mode. When it is heated to 40 degrees, it stops at 35 degrees and starts to return. The difference is 5
P2:Temperature correction:Press and hold the setting button for 3 seconds to enter the internal menu. Press the up and down keys to select P2, press the setting button again, and set the required calibration temperature by the up and down keys. In the setting, if the detected temperature value is 0.5 °C larger than the actual temperature value, the calibration temperature to be set is -0.5 °C. If the detected temperature value is 1 °C smaller than the actual temperature value, the calibration temperature to be set is 1 °C, and the detection temperature +-calibration temperature = actual temperature.
P3:Delay start:Press and hold the setting button for 3 seconds to enter the internal menu, select P3 by the up and down keys, press the setting button again, and set the required delay time (minutes) by the up and down keys. The delay start is generally used for compressor refrigeration. If it is used in the refrigerator freezer, this value needs to be set. According to the compressor back pressure, the set value is usually 3-6 minutes, if it is not used to control the compressor or no delay. Function, skip this item directly.
Instructions
Set the difference back:Why set the backlash setting When you control the device, the temperature will rise or fall back. How many degrees does the temperature change If you want the temperature to change by 10°, the device needs to set the difference back to 10. By setting the difference back, the device can cycle through the temperature range.
Set the stop temperature:press the set button once in the normal display state to stop the temperature value flashing. You can set the desired stop temperature value by using the up and down keys.
How to set factory settings are restored:Press and hold the up and down keys while the power is on, the digital tube display 888 will then automatically jump to the detection temperature.
Heating mode setting method
Setup steps
The first step is to set P0=H
The second step sets the stop temperature
The third step sets the hysteresis value
Setting method
1. Press and hold the setting button to enter the internal menu and set P0 to H.
2. Press the setting button to stop the temperature flashing, and the up and down keys to set the temperature.
3. Press and hold the setting button to enter the internal menu and set the P1 hysteresis setting.
Use Cases
Control the water heater, heat it to 65 ° C to stop, the temperature drops back to 50 ° C and start heating again, how to set
Step 1:Determine the working mode as heating mode and set P0 to H
Step 2:Press the setting button to stop the temperature flashing. Set the starting temperature to 50 °C with the up and down keys.
The third step:stop at 65 °C, start again at 50 °C, so the return difference needs to be set to 65-50=15, enter the internal menu and set P1 to 15, the heating case is set!
Cooling mode setting mode
Setup steps
The first step is to set P0=C
The second step sets the stop temperature
The third step sets the hysteresis value
Setting method
Press and hold the setting button to enter the internal menu and set P0 to C.
Press the setting button to stop the temperature flashing, and the up and down keys to set the temperature.
Long press the setting button to enter the internal menu, set the P1 backlash setting
Use Cases
Control the farm, ventilate to 26 ° C to stop, the temperature rises to 28 ° C to start the refrigeration again, how to set up
The first step:determine the working mode is cooling mode, set P0 to C
Step 2:Press the SET button to stop the temperature flashing. Set the stop temperature to 28 °C with the up and down keys.
The third step:stop at 26 ° C, start again at 28 ° C, so the return difference needs to be set to 28-26 = 2, enter the internal menu to set P1 to 2, the cooling case is set!
Package includes
3 x Miniature embedded digital display thermostat
| Weight | 0.138 kg |
|---|
Related products
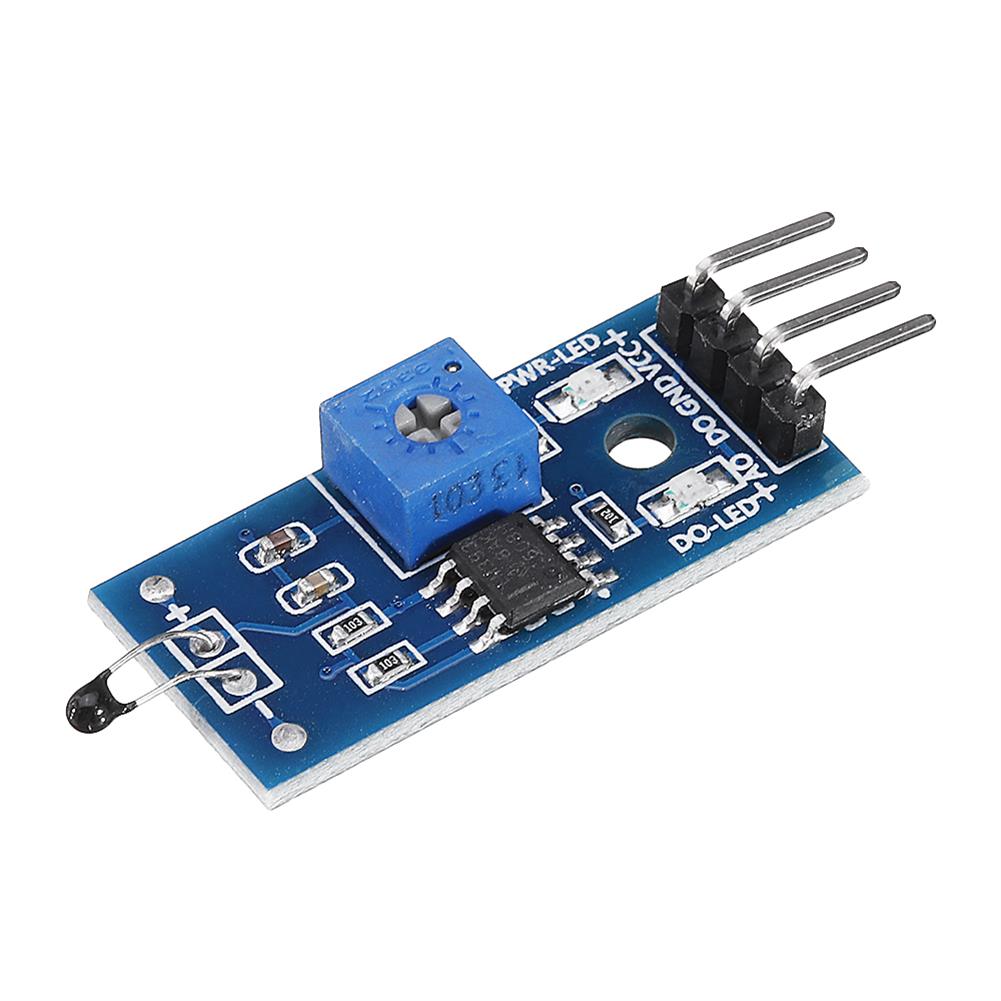
10pcs thermal Sensor Module Temperature Switch thermistor Sensor Board
$10.88Sensor & Detector ModuleAdd to cartUsesTemperature detection, temperature control sensors , ambient temperature detectionFeatures1. Using the NTC thermistor sensor, good sensitivity2. The comparator output signal is clean, good waveform, driving ability, more than 15mA.3. Adjust the temperature distribution position detection threshold4. The working voltage 3.3V-5V5. The output format:digital switching outputs ( 0 and 1 )6. Fixed bolt holes for easy …
10pcs thermal Sensor Module Temperature Switch thermistor Sensor BoardRead More
30pcs thermal Sensor Module Temperature Switch thermistor Sensor Board
$27.45Sensor & Detector ModuleAdd to cartUsesTemperature detection, temperature control sensors , ambient temperature detectionFeatures1. Using the NTC thermistor sensor, good sensitivity2. The comparator output signal is clean, good waveform, driving ability, more than 15mA.3. Adjust the temperature distribution position detection threshold4. The working voltage 3.3V-5V5. The output format:digital switching outputs ( 0 and 1 )6. Fixed bolt holes for easy …
30pcs thermal Sensor Module Temperature Switch thermistor Sensor BoardRead More
4 Digital LED Tachometer RPM Speed Meter + Proximity Switch Sensor NPN
$26.23Sensor & Detector ModuleAdd to cartSpecificationsWorking power supply:DC8-24v 40 mAMeasure range:5-9999 RPMDisplay:Blue LED 67*32mmSign:Pusle signal, Hall NPN 3 wires normally openHall proximity model:NJK-5002CAppearance:M12mm cylinderDetection range:10mmDetected objects:MagnetResponse frequency:100HZOperating temperature:0 to 50°CPackage included1 x Proximity switch1 x Tachometer
50pcs thermal Sensor Module Temperature Switch thermistor Sensor Board
$44.79Sensor & Detector ModuleAdd to cartUsesTemperature detection, temperature control sensors , ambient temperature detectionFeatures1. Using the NTC thermistor sensor, good sensitivity2. The comparator output signal is clean, good waveform, driving ability, more than 15mA.3. Adjust the temperature distribution position detection threshold4. The working voltage 3.3V-5V5. The output format:digital switching outputs ( 0 and 1 )6. Fixed bolt holes for easy …
50pcs thermal Sensor Module Temperature Switch thermistor Sensor BoardRead More


Customers Also Viewed
10pcs ZF-1 ASK 315MHz Fixed Code Learning Code Transmission Module Wireless Remote Control Receiving Board
$33.80Smart ModuleAdd to cartFeatureProduct model:ZF-7 (with code)Transmission frequency:315MHZWorking voltage:DC 9V ~12VModulation method:ASKQuiescent current:0uAWorking current:30~45mACoding type:fixed code (SC2262)Radiated power:30~45mWTransmission distance:1000 meters (receiver sensitivity -108dBm)Volume:40mm*20mm*10mm:PIN:Description1:ANT:RF signal input pin, this pin should be connected to the antenna2:-:Negative power supply3:+:Positive power supply4:H-L:Digital pinRated parameter:Symbol:ValueDC supply voltage:VDD-VSS:9V-12VStorage temperature range (TS):TSTG:-12°C to 75°CWelding temperature:+260°CPackage includes10 x Receiver Board
2pcs Digital DC 0-100V 0-10A 250W Tester DC7-12V LCD Digital Display Voltage Current Power Meter Voltmeter Ammeter Amp Detector Geekcreit for Arduino – products that work with official for Arduino boards
$34.98Test & Measuring ModuleAdd to cartSpecificationsSimultaneous display of voltage and currentVoltage Measurement Range:DC 0-100VCurrent Measurement Range:0-10APower Measurement Range:0-1000WVoltage Error Range:÷1% (Adjustable)Current Error Range:÷1% (Adjustable)Power Error Range:÷1% (Adjustable)Refresh Rate:300ms/TimesDisplay Method:HTN LCD 3 Rows of 3 DigitsSupply Voltage:DC 7-12VWorking CurrentWorking Temperature:-10 to 60→Package Included2 x DC Digital Voltmeter Ammeter 4 x Cable
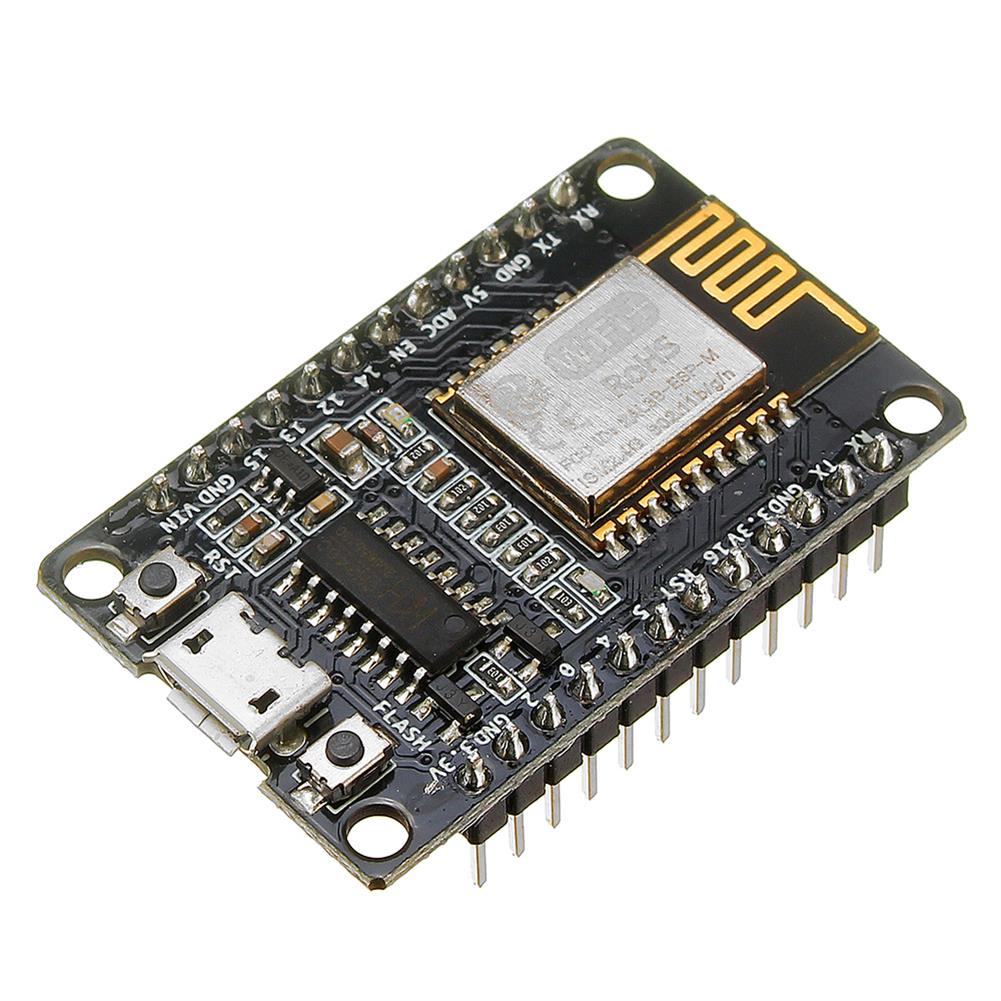
5pcs ESP8285 Development Board Nodemcu-M Based on ESP-M3 WiFi Wireless Module Compatible with Nodemcu Lua V3
$49.76Motherboard & Development BoardAdd to cartOverview1. It is fully compatible with Nodemcu V3, but cheaper than it is. NodeMcu is an open source firmware and development tool that helps you prototype your IOT products in several Lua script lines.2. The ESP8285-based development kit integrates GPIO, PWM, IIC, 1-Wire and ADC into a single board.3. The fastest way with the NodeMCU …
Vacuum Cleaner Charger Base for iRobot Roomba 5 6 7 8 9 Serie 595 780 880 860 980 960 Charger Base Dock
$85.04Solar CollectorsAdd to cartSpecificationName:Charger Base DockModel:C04612Material:Plastic Color:Black Size:As picture shownApplication Models:For iRobot Roomba 500/600/700/800/900Features-Let the robot automatically recharge when there is no power.-A good helper for family cleaning.Package Include1 x Charger Base Dock1 x Charger Cable
DC 12V 3.5mA Microphone Pickup Audio Microphone Amplifier Module DIY Kit Dual Track Output Gain Adjustable
$4.93DIY Electronic KitsAdd to cartDescriptionProduct name:Microphone with adjustable sensitivityWorking voltage:DC9-15V, 12V recommendedWorking current:above 100mAResponse frequency:20Hz-20KHzMonitoring range:about 100 square metersFinished product size:length 56 * width 25 * height 16mmProduct net weight:15 gramsThe power input has anti-reverse protection, which can effectively prevent the module from being damaged if the power is reversed.Product descriptionThis product uses a low-noise processing chip, plus a …
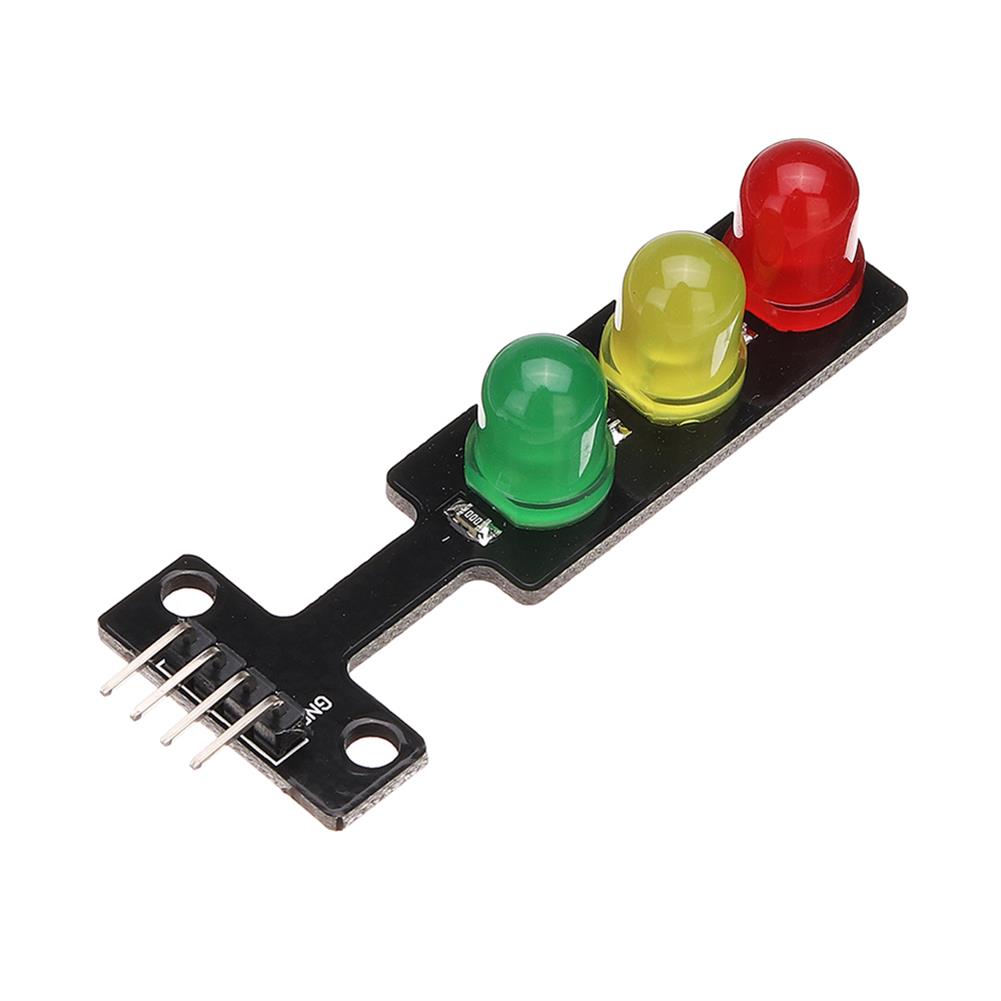
3pcs 5V LED Traffic Light Display Module Electronic Building Blocks Board
$4.85Display ScreenAdd to cartFeatureSize:56 x 21 x 11mmFixing hole:3mmPitch:15mmColor:red yellow greenLED:8mm x 3Brightness:Normal brightnessVoltage:5VInput:Digital levelInterface:common cathode, red, yellow and green separate controlPlatform:, microcontrollerPackage includes3 x LED Traffic Light Module
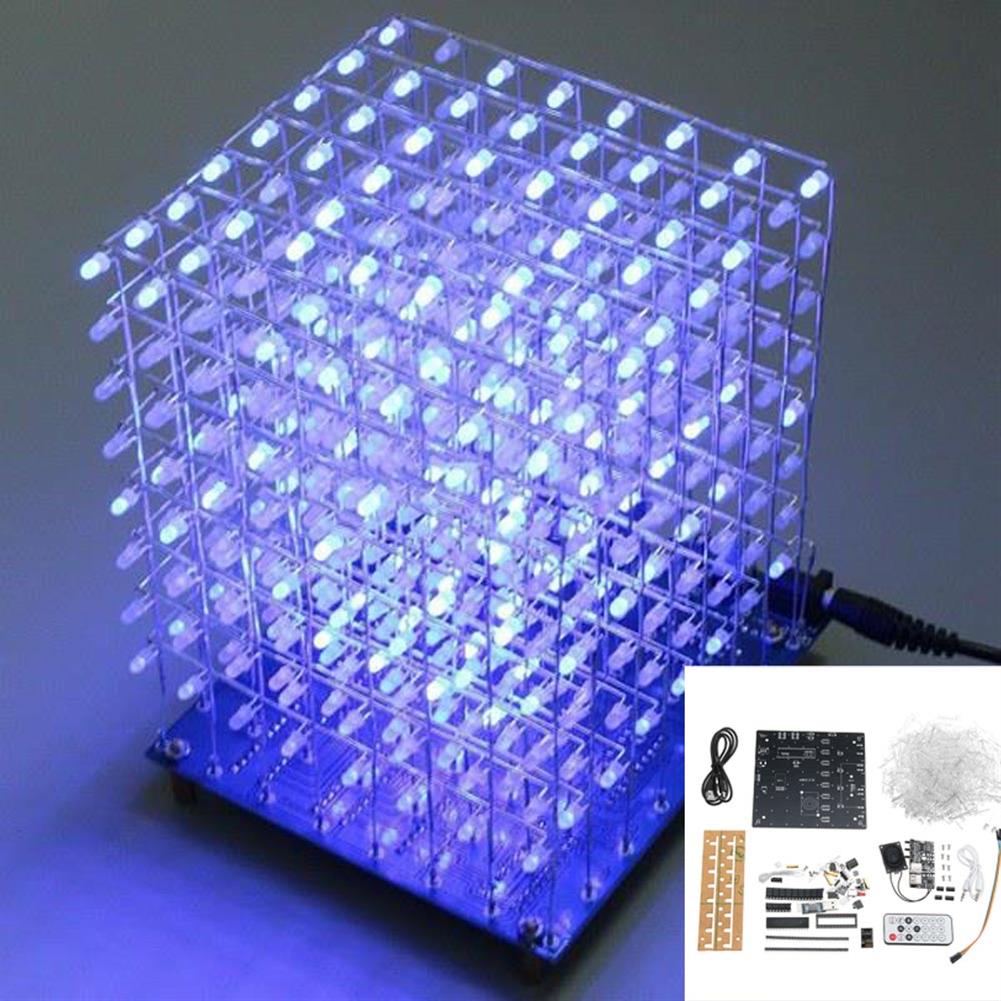
Upgraded Version 3D Light Cube Kit 8x8x8 Blue LED MP3 Music Spectrum DIY Electronic Kit
$72.16DIY Electronic KitsAdd to cartNote1. This product does not include housing!! if you need the housing, please purchased separately (Product ID:1247731).2. This is a DIY kit, you need to have some knowledge of electronics and ability.3. Need a lot of soldering, you should have enough patience.4. 8x8x8 blue lights display version.5. APP function only supports Android6. File:Click here to …
Upgraded Version 3D Light Cube Kit 8x8x8 Blue LED MP3 Music Spectrum DIY Electronic KitRead More


Recently Viewed Products
-
 3Pcs Geekcreit DIY Shaking Red LED Dice Kit with Small Vibration Motor $20.94
 -
 30pcs 4S Single 3.7V 18650 Lithium Battery Capacity indicator Module Percent Power Level Tester LED Display Board $49.92
 -
 1 Channel 5V USB Relay Switch Programmable Computer Control for Smart Home Module $8.82
 -
 CN3791 MPPT Solar Panel Voltage Regulator Controller 6V 9V 12V 1 Cell Lithium Battery Charge Solar Panel Charger Board Controller Module $15.30
 -
 3pcs DC 12V Step Up Boost Converter Voltage Regulate Power Supply Module Board with Enable ON/OFF $13.68
 -
 5pcs 2x3W Micro USB Wireless bluetooth Speaker Audio Receiver Digital Amplifier Board $41.76
 -
 5pcs Mini Digital Voltmeter Ammeter DC 100V 10A Panel Amp Volt Voltage Current Meter Tester 0.56 Red Red Dual LED Display $30.24
 -
 50pcs 1W Metal Film Resistor 1% 1M ohm $4.77
 -
 30pcs VHM-314 V.20 MP3 Bluetooth Audio Receiving and Decoding Board 5.0 Lossless Car Audio Decoder Amplifier Module $120.41
 -
 Geekcreit 4050pcs 135 Value 1/4W Metal Film Resistor Assortment Kit $42.15
Reviews
There are no reviews yet.