


3pcs XH-W1321 0.1 Digital thermostat Mini Embedded Blue Digital Display Switch Temperature Controller with Waterproof NTC Sensor Meter
$30.89
Shipping:Standard Shipping about 10-25 business days
Secure Payment:Paypal,VISA,MasterCard
Specifications
Product Name:Miniature embedded digital display thermostat
Product Model:XH-1321
Material:ABS
Case Color:White
LED Color:Blue
Input Voltage:DC12V
Temperature Measurement Range:-50-110→
Temperature Control Range:-50-110→
Control Accuracy:0.1→
Display Accuracy:0.1→
Measuring Input:NTC10K Waterproof Probe L=1 Meter
Output Type:Relay Output(Output Switch)
Output Capacity:10A
Size (Length x Width x Height):about 56 x 38 x 32mm (2.17 x 1.50 x 1.26 Inch )
Opening hole size:46 x 34mm
Key Function
SET:Press once during normal use, directly enter the stop temperature setting state, use the up and down keys to set the required stop temperature, long press to enter the internal setting menu.
UP:After long press the setting button to enter the internal setting, increase the value setting by the up button.
DOWN:After long press the setting button to enter the internal setting, use the up button to decrease the value setting.
Code:Description:Setting range (method):Factory settings
P0:Operating mode:H/C:C
P1:Backlash setting:0.1-50:2
P2:Temperature correction:-9.9~+9.9°C:0
P3:Delayed start:0-9:0
Detailed Code Descriptions
P0:Working mode:This value must be set when the thermostat is used for the first time. If it is used for heating heating, set to H, if it is used for cooling cooling, set to C.
P1:Hypothesis setting:Press and hold the setting button for 3 seconds to enter the internal menu, select P1, and press the setting button again to enter the hysteresis value setting state. The hysteresis is the difference required when the thermostat reaches the set temperature and stops working again. For example, it is set to the heating mode. When it is heated to 40 degrees, it stops at 35 degrees and starts to return. The difference is 5
P2:Temperature correction:Press and hold the setting button for 3 seconds to enter the internal menu. Press the up and down keys to select P2, press the setting button again, and set the required calibration temperature by the up and down keys. In the setting, if the detected temperature value is 0.5 °C larger than the actual temperature value, the calibration temperature to be set is -0.5 °C. If the detected temperature value is 1 °C smaller than the actual temperature value, the calibration temperature to be set is 1 °C, and the detection temperature +-calibration temperature = actual temperature.
P3:Delay start:Press and hold the setting button for 3 seconds to enter the internal menu, select P3 by the up and down keys, press the setting button again, and set the required delay time (minutes) by the up and down keys. The delay start is generally used for compressor refrigeration. If it is used in the refrigerator freezer, this value needs to be set. According to the compressor back pressure, the set value is usually 3-6 minutes, if it is not used to control the compressor or no delay. Function, skip this item directly.
Instructions
Set the difference back:Why set the backlash setting When you control the device, the temperature will rise or fall back. How many degrees does the temperature change If you want the temperature to change by 10°, the device needs to set the difference back to 10. By setting the difference back, the device can cycle through the temperature range.
Set the stop temperature:press the set button once in the normal display state to stop the temperature value flashing. You can set the desired stop temperature value by using the up and down keys.
How to set factory settings are restored:Press and hold the up and down keys while the power is on, the digital tube display 888 will then automatically jump to the detection temperature.
Heating mode setting method
Setup steps
The first step is to set P0=H
The second step sets the stop temperature
The third step sets the hysteresis value
Setting method
1. Press and hold the setting button to enter the internal menu and set P0 to H.
2. Press the setting button to stop the temperature flashing, and the up and down keys to set the temperature.
3. Press and hold the setting button to enter the internal menu and set the P1 hysteresis setting.
Use Cases
Control the water heater, heat it to 65 ° C to stop, the temperature drops back to 50 ° C and start heating again, how to set
Step 1:Determine the working mode as heating mode and set P0 to H
Step 2:Press the setting button to stop the temperature flashing. Set the starting temperature to 50 °C with the up and down keys.
The third step:stop at 65 °C, start again at 50 °C, so the return difference needs to be set to 65-50=15, enter the internal menu and set P1 to 15, the heating case is set!
Cooling mode setting mode
Setup steps
The first step is to set P0=C
The second step sets the stop temperature
The third step sets the hysteresis value
Setting method
Press and hold the setting button to enter the internal menu and set P0 to C.
Press the setting button to stop the temperature flashing, and the up and down keys to set the temperature.
Long press the setting button to enter the internal menu, set the P1 backlash setting
Use Cases
Control the farm, ventilate to 26 ° C to stop, the temperature rises to 28 ° C to start the refrigeration again, how to set up
The first step:determine the working mode is cooling mode, set P0 to C
Step 2:Press the SET button to stop the temperature flashing. Set the stop temperature to 28 °C with the up and down keys.
The third step:stop at 26 ° C, start again at 28 ° C, so the return difference needs to be set to 28-26 = 2, enter the internal menu to set P1 to 2, the cooling case is set!
Package includes
3 x Miniature embedded digital display thermostat
| Weight | 0.132 kg |
|---|
Related products
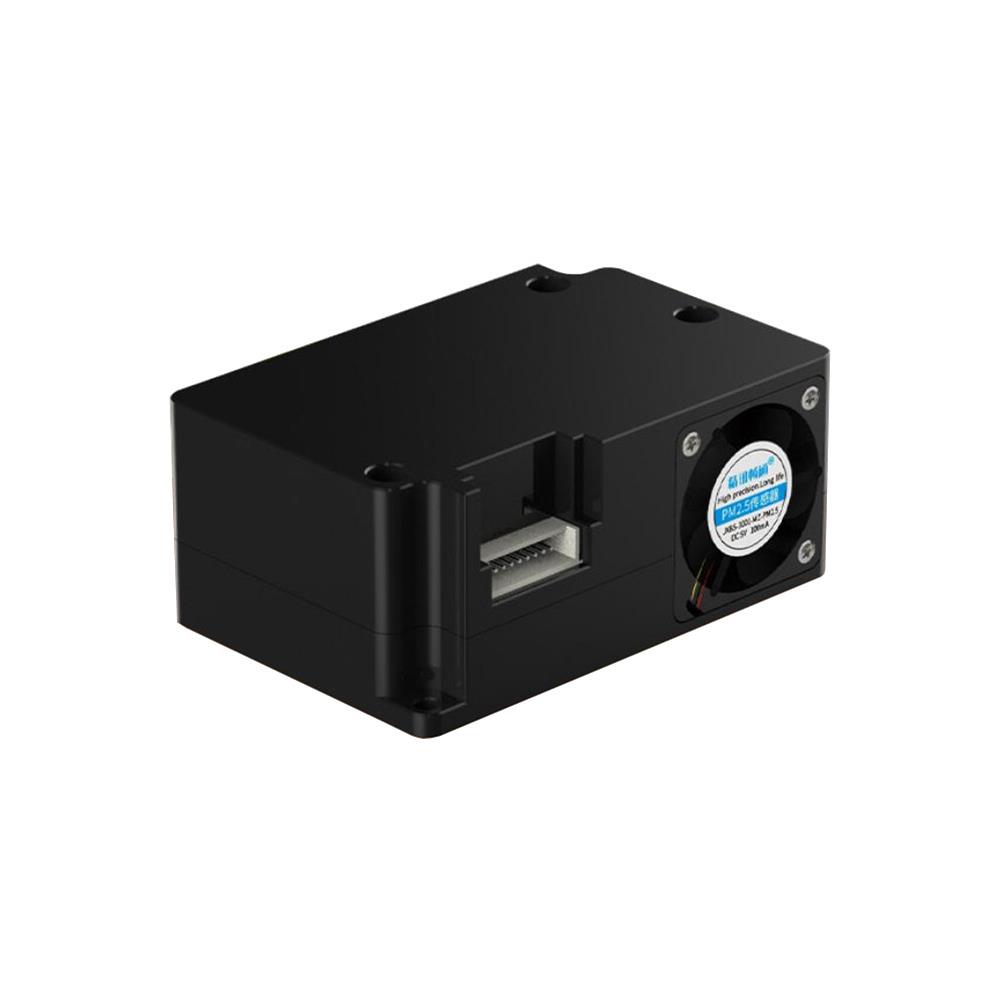
PM2.5 Laser Particulate Matter Sensor PM1.0 PM10 Air Quality Detection Sensor Monitoring Particulate Matter Sensor Module
$39.35Sensor & Detector ModuleAdd to cartTechnical ParametersPM2.5/PM10 measuring range:0-999ug/m3PM2.5/PM10 resolution:lug/m3PM2.5/PM10 accuracyConsistency of particle concentration:0-100ug/m3:÷10%;100-500ug/m3:÷10%Minimum detectable particle diameter:0.3umPower supply voltage:5V÷0.1VMaximum working current:100mAOperating temperature range:-10~60CWorking humidity range:0-95%RHStorage temperature:-30~70CResponse speedProduct appearance size:53x35x23mmApplication areasAir Purifier / Air Quality Detector / Fresh Air Ventilation SystemSupporting air-conditioning / cars with air purification function and consumer electronicsAgricultural greenhouse / environmental monitoring of outdoor breeding placesKitchen and bathroom …
10pcs 6mA 3-100CM Adjustable infrared Digital Obstacle Avoidance Sensor Module
$64.02Sensor & Detector ModuleAdd to cartSpecificationsWorking voltage:DC 3.8V-5.5VWorking current (5V):typical current 6mAInput and output signals (3 lines):GND, VCC is power, and VCC is 3.8V-5.5VObstacle detection time (range from obstacle-free to obstacle-free or obstacle-free to obstacle-free)Working Principle:Sensors actively emit infrared light, according to reflected light detection, if detected obstacles, OUT foot output 0, otherwise 1.Detection distance (test environment, indoor, maximum power, …
10pcs 6mA 3-100CM Adjustable infrared Digital Obstacle Avoidance Sensor ModuleRead More
3pcs 6mA 3-100CM Adjustable infrared Digital Obstacle Avoidance Sensor Module
$20.45Sensor & Detector ModuleAdd to cartSpecificationsWorking voltage:DC 3.8V-5.5VWorking current (5V):typical current 6mAInput and output signals (3 lines):GND, VCC is power, and VCC is 3.8V-5.5VObstacle detection time (range from obstacle-free to obstacle-free or obstacle-free to obstacle-free)Working Principle:Sensors actively emit infrared light, according to reflected light detection, if detected obstacles, OUT foot output 0, otherwise 1.Detection distance (test environment, indoor, maximum power, …
3pcs 6mA 3-100CM Adjustable infrared Digital Obstacle Avoidance Sensor ModuleRead More
thermal Sensor Module Temperature Switch thermistor Sensor Board
$4.36Sensor & Detector ModuleAdd to cartUsesTemperature detection, temperature control sensors , ambient temperature detectionFeatures1. Using the NTC thermistor sensor, good sensitivity2. The comparator output signal is clean, good waveform, driving ability, more than 15mA.3. Adjust the temperature distribution position detection threshold4. The working voltage 3.3V-5V5. The output format:digital switching outputs ( 0 and 1 )6. Fixed bolt holes for easy …
thermal Sensor Module Temperature Switch thermistor Sensor BoardRead More


Customers Also Viewed
OpenMV OpenMV3 4 2 Camera Module M7 H7 LCD Expansion Board Display Screen Module
$50.02Display ScreenAdd to cartnullFeatureThe LCD Shield gives your OpenMV Cam the ability to display what it sees on-the-go while not connected to your computer. It features a 1.8inch 128×160 16-bpp (RGB565) TFT LCD display with a controllable backlight. Your OpenMV Cam’s firmware has built-in support for controlling the LCD Shield using the LCD module.ApplicationsThe LCD Shield is great …
OpenMV OpenMV3 4 2 Camera Module M7 H7 LCD Expansion Board Display Screen ModuleRead More
3pcs MFRC-522 RC522 RFID RF IC Card Reader Sensor Module Solder 8P Socket
$10.96Sensor & Detector ModuleAdd to cartIntroduction to the RFID moduleThe MF522-AN module adopts MFRC522 original chip design card reader circuit, which is easy to use and low in cost. It is suitable for users of advanced applications such as device development and card reader development, and users who need to design/produce RF card terminals. This module can be directly loaded …
3pcs MFRC-522 RC522 RFID RF IC Card Reader Sensor Module Solder 8P SocketRead More
Transparent Acrylic Sheet Housing Module Case for DSO138 Oscilloscope
$17.48DIY Electronic KitsAdd to cartFeatureThis product is for DSO138 Oscilloscope only. (Product ID:984002, 969762)Color:TransparentMaterial:AcrylicInstallation size:12.7 x 8.7 x 2.6 (L*W*H)Note:Package does not includes the DSO138 Oscilloscope.Instruction:Click to openPackage includes1 x DSO138 Transparent Acrylic Sheet
20Pcs 3V 650nM 5mW Line Laser Diode Module
$41.34Module ComponentsAdd to cartDescriptionSpot mode:line(Continuous output)Dimensions:diameter 9mm x length 23mmLaser working life:5000-10000 hours or moreLaser wavelength:650nmOutput power:5mWOperating voltage:DC3VWorking current:16mA ~ 20mAWorking temperature:-36 → ~ 65 →Storage temperature:-36 → ~ 65 →Level:sub-industrial gradeColor:red lightMaterial:brassApplication(1) industrial grade:can be used for equipment, health care, military, Kam pseudo security, stage lighting, tools, U disk, mobile phone, projection teaching flip pen, warm measuring …
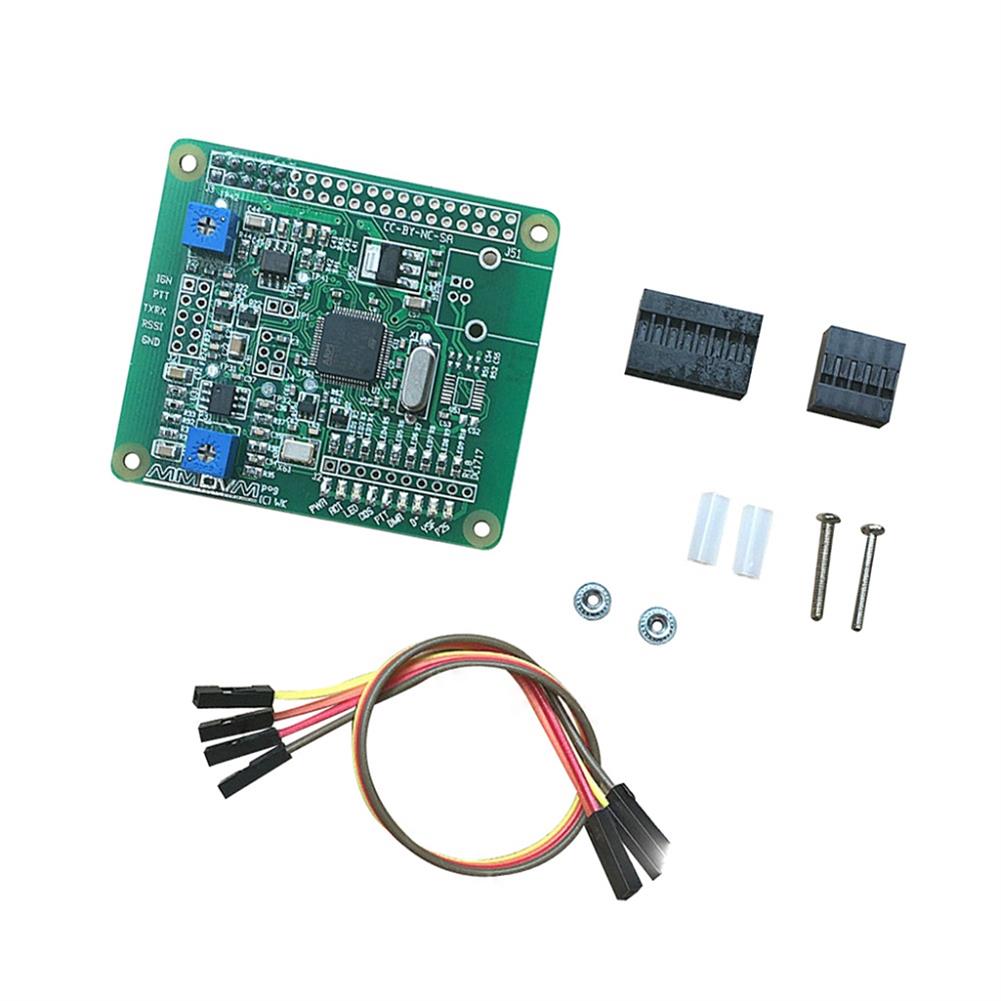
MMDVM Open-Source Multi-Mode Digital Voice Modem DIY Kit Expansion Board for Raspberry Pi
$103.03Raspberry Pi & Orange PiAdd to cartDescription– This board could cooperate Raspberry Pi , Orange Pi, a variety of school development board to use.– Board has been applied in the GM300 GM3188 3688 950I 338 Vitex DR-1X, other types of repeaters and car stations need to be studied yourself.– The MMDVM is intended to be an open-source Multi-Mode Digital Voice Modem,which …
MMDVM Open-Source Multi-Mode Digital Voice Modem DIY Kit Expansion Board for Raspberry PiRead More
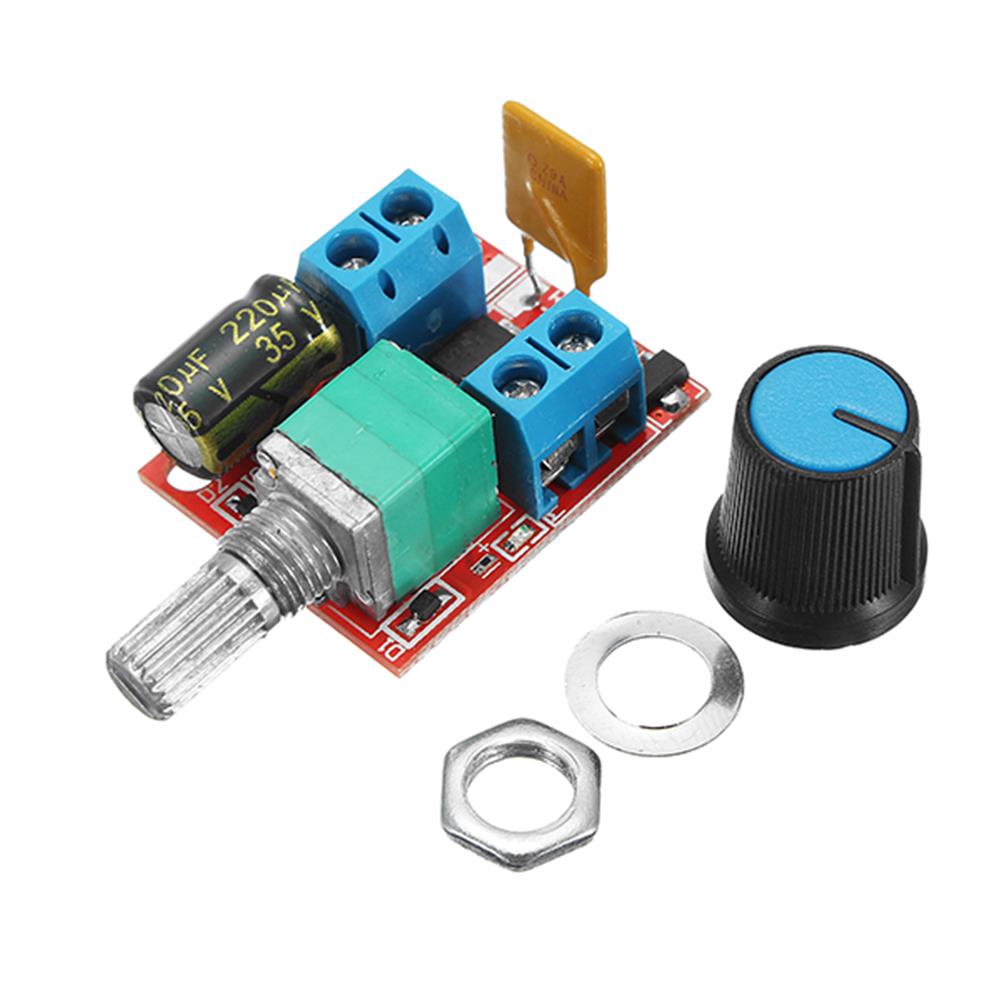
3Pcs 5V-30V DC PWM Speed Controller Mini Electrical Motor Control Switch LED Dimmer Module
$10.04Other Module BoardAdd to cartFeaturePWM DC motor speed controller is a very safe product.When the situation is overcurrent, it will disconnect by itself. after cooling off a few seconds, the fuse will recovery automatically.With high voltage and high current resettable fuseMini but usefulSpecificationOperating voltage:DC 5-30VControl power:90W (maximum)Quiescent current:0.015A (standby)PWM duty cycle:1% -100%PWM frequency:10khzSize:29mm*23mm (excluding handles)Total height:15mmKnob color:Send randomlyPackage included3 …
3Pcs 5V-30V DC PWM Speed Controller Mini Electrical Motor Control Switch LED Dimmer ModuleRead More


Reviews
There are no reviews yet.