


3pcs XH-W1321 0.1 Digital thermostat Mini Embedded Blue Digital Display Switch Temperature Controller with Waterproof NTC Sensor Meter
$30.89
Shipping:Standard Shipping about 10-25 business days
Secure Payment:Paypal,VISA,MasterCard
Specifications
Product Name:Miniature embedded digital display thermostat
Product Model:XH-1321
Material:ABS
Case Color:White
LED Color:Blue
Input Voltage:DC12V
Temperature Measurement Range:-50-110→
Temperature Control Range:-50-110→
Control Accuracy:0.1→
Display Accuracy:0.1→
Measuring Input:NTC10K Waterproof Probe L=1 Meter
Output Type:Relay Output(Output Switch)
Output Capacity:10A
Size (Length x Width x Height):about 56 x 38 x 32mm (2.17 x 1.50 x 1.26 Inch )
Opening hole size:46 x 34mm
Key Function
SET:Press once during normal use, directly enter the stop temperature setting state, use the up and down keys to set the required stop temperature, long press to enter the internal setting menu.
UP:After long press the setting button to enter the internal setting, increase the value setting by the up button.
DOWN:After long press the setting button to enter the internal setting, use the up button to decrease the value setting.
Code:Description:Setting range (method):Factory settings
P0:Operating mode:H/C:C
P1:Backlash setting:0.1-50:2
P2:Temperature correction:-9.9~+9.9°C:0
P3:Delayed start:0-9:0
Detailed Code Descriptions
P0:Working mode:This value must be set when the thermostat is used for the first time. If it is used for heating heating, set to H, if it is used for cooling cooling, set to C.
P1:Hypothesis setting:Press and hold the setting button for 3 seconds to enter the internal menu, select P1, and press the setting button again to enter the hysteresis value setting state. The hysteresis is the difference required when the thermostat reaches the set temperature and stops working again. For example, it is set to the heating mode. When it is heated to 40 degrees, it stops at 35 degrees and starts to return. The difference is 5
P2:Temperature correction:Press and hold the setting button for 3 seconds to enter the internal menu. Press the up and down keys to select P2, press the setting button again, and set the required calibration temperature by the up and down keys. In the setting, if the detected temperature value is 0.5 °C larger than the actual temperature value, the calibration temperature to be set is -0.5 °C. If the detected temperature value is 1 °C smaller than the actual temperature value, the calibration temperature to be set is 1 °C, and the detection temperature +-calibration temperature = actual temperature.
P3:Delay start:Press and hold the setting button for 3 seconds to enter the internal menu, select P3 by the up and down keys, press the setting button again, and set the required delay time (minutes) by the up and down keys. The delay start is generally used for compressor refrigeration. If it is used in the refrigerator freezer, this value needs to be set. According to the compressor back pressure, the set value is usually 3-6 minutes, if it is not used to control the compressor or no delay. Function, skip this item directly.
Instructions
Set the difference back:Why set the backlash setting When you control the device, the temperature will rise or fall back. How many degrees does the temperature change If you want the temperature to change by 10°, the device needs to set the difference back to 10. By setting the difference back, the device can cycle through the temperature range.
Set the stop temperature:press the set button once in the normal display state to stop the temperature value flashing. You can set the desired stop temperature value by using the up and down keys.
How to set factory settings are restored:Press and hold the up and down keys while the power is on, the digital tube display 888 will then automatically jump to the detection temperature.
Heating mode setting method
Setup steps
The first step is to set P0=H
The second step sets the stop temperature
The third step sets the hysteresis value
Setting method
1. Press and hold the setting button to enter the internal menu and set P0 to H.
2. Press the setting button to stop the temperature flashing, and the up and down keys to set the temperature.
3. Press and hold the setting button to enter the internal menu and set the P1 hysteresis setting.
Use Cases
Control the water heater, heat it to 65 ° C to stop, the temperature drops back to 50 ° C and start heating again, how to set
Step 1:Determine the working mode as heating mode and set P0 to H
Step 2:Press the setting button to stop the temperature flashing. Set the starting temperature to 50 °C with the up and down keys.
The third step:stop at 65 °C, start again at 50 °C, so the return difference needs to be set to 65-50=15, enter the internal menu and set P1 to 15, the heating case is set!
Cooling mode setting mode
Setup steps
The first step is to set P0=C
The second step sets the stop temperature
The third step sets the hysteresis value
Setting method
Press and hold the setting button to enter the internal menu and set P0 to C.
Press the setting button to stop the temperature flashing, and the up and down keys to set the temperature.
Long press the setting button to enter the internal menu, set the P1 backlash setting
Use Cases
Control the farm, ventilate to 26 ° C to stop, the temperature rises to 28 ° C to start the refrigeration again, how to set up
The first step:determine the working mode is cooling mode, set P0 to C
Step 2:Press the SET button to stop the temperature flashing. Set the stop temperature to 28 °C with the up and down keys.
The third step:stop at 26 ° C, start again at 28 ° C, so the return difference needs to be set to 28-26 = 2, enter the internal menu to set P1 to 2, the cooling case is set!
Package includes
3 x Miniature embedded digital display thermostat
| Weight | 0.132 kg |
|---|
Related products
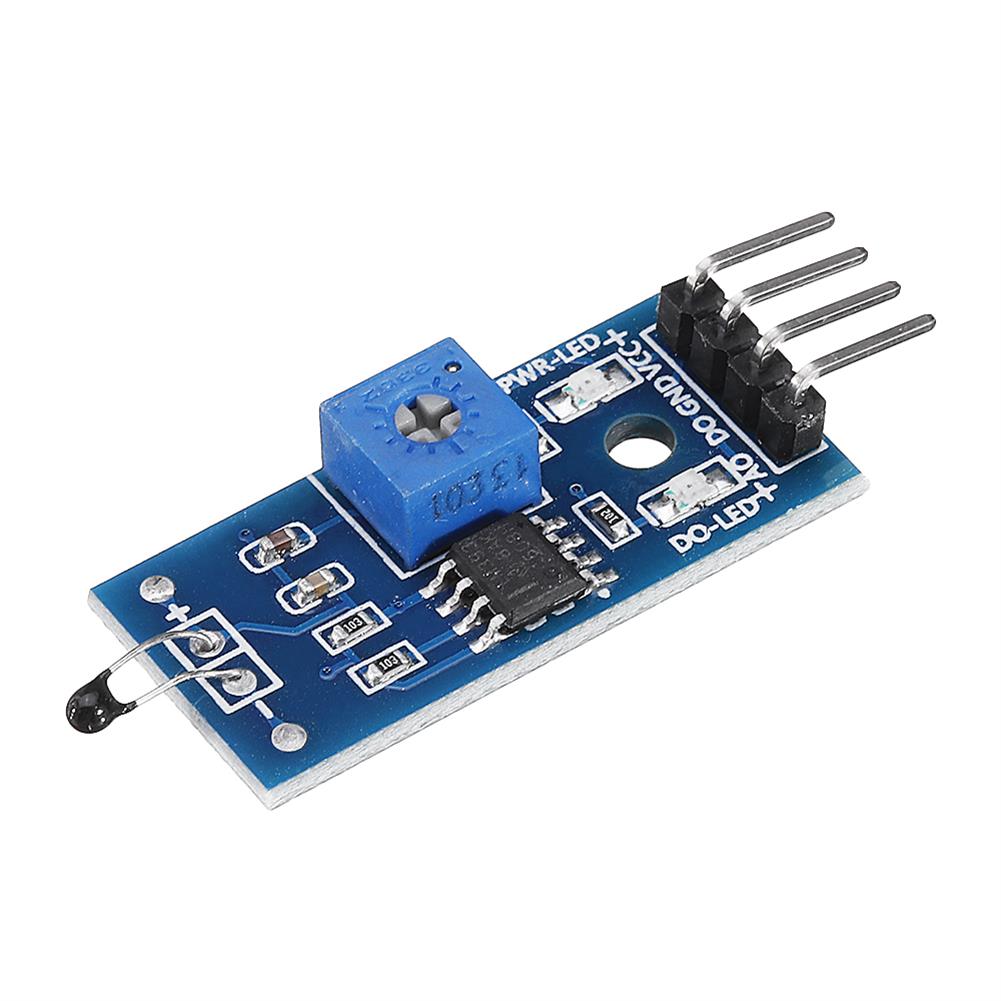
3pcs thermal Sensor Module Temperature Switch thermistor Sensor Board
$5.49Sensor & Detector ModuleAdd to cartUsesTemperature detection, temperature control sensors , ambient temperature detectionFeatures1. Using the NTC thermistor sensor, good sensitivity2. The comparator output signal is clean, good waveform, driving ability, more than 15mA.3. Adjust the temperature distribution position detection threshold4. The working voltage 3.3V-5V5. The output format:digital switching outputs ( 0 and 1 )6. Fixed bolt holes for easy …
3pcs thermal Sensor Module Temperature Switch thermistor Sensor BoardRead More
5pcs 6mA 3-100CM Adjustable infrared Digital Obstacle Avoidance Sensor Module
$36.94Sensor & Detector ModuleAdd to cartSpecificationsWorking voltage:DC 3.8V-5.5VWorking current (5V):typical current 6mAInput and output signals (3 lines):GND, VCC is power, and VCC is 3.8V-5.5VObstacle detection time (range from obstacle-free to obstacle-free or obstacle-free to obstacle-free)Working Principle:Sensors actively emit infrared light, according to reflected light detection, if detected obstacles, OUT foot output 0, otherwise 1.Detection distance (test environment, indoor, maximum power, …
5pcs 6mA 3-100CM Adjustable infrared Digital Obstacle Avoidance Sensor ModuleRead More
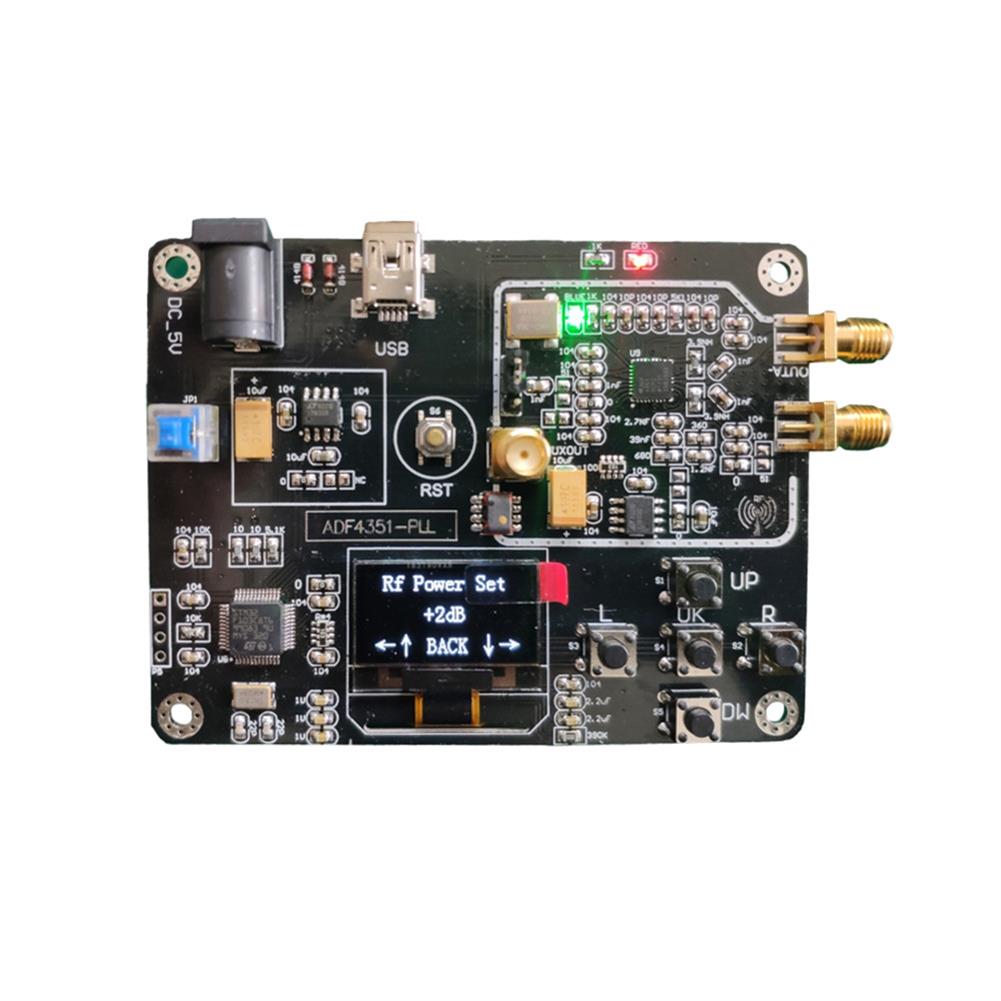
Geekcreit Signal Generator Module 35M-4.4GHz RF Signal Source Frequency Synthesizer ADF4351 Development Board
$54.66Sensor & Detector ModuleAdd to cartThe Source code:Click here to openSchematic:Click here to openHighlightsWith OLED displayHost computer USB & serial portIntegrated key operationWide range voltage supplyGood man-machine interface Many improvements on the phase noise, phase spurious and loop filterMuch enhancement on the power filter and ground processingModule can achieve 35MHz – 4.4GHz frequency output, point frequency, sweep, frequency hopping and …
5pcs thermal Sensor Module Temperature Switch thermistor Sensor Board
$6.20Sensor & Detector ModuleAdd to cartUsesTemperature detection, temperature control sensors , ambient temperature detectionFeatures1. Using the NTC thermistor sensor, good sensitivity2. The comparator output signal is clean, good waveform, driving ability, more than 15mA.3. Adjust the temperature distribution position detection threshold4. The working voltage 3.3V-5V5. The output format:digital switching outputs ( 0 and 1 )6. Fixed bolt holes for easy …
5pcs thermal Sensor Module Temperature Switch thermistor Sensor BoardRead More


Customers Also Viewed
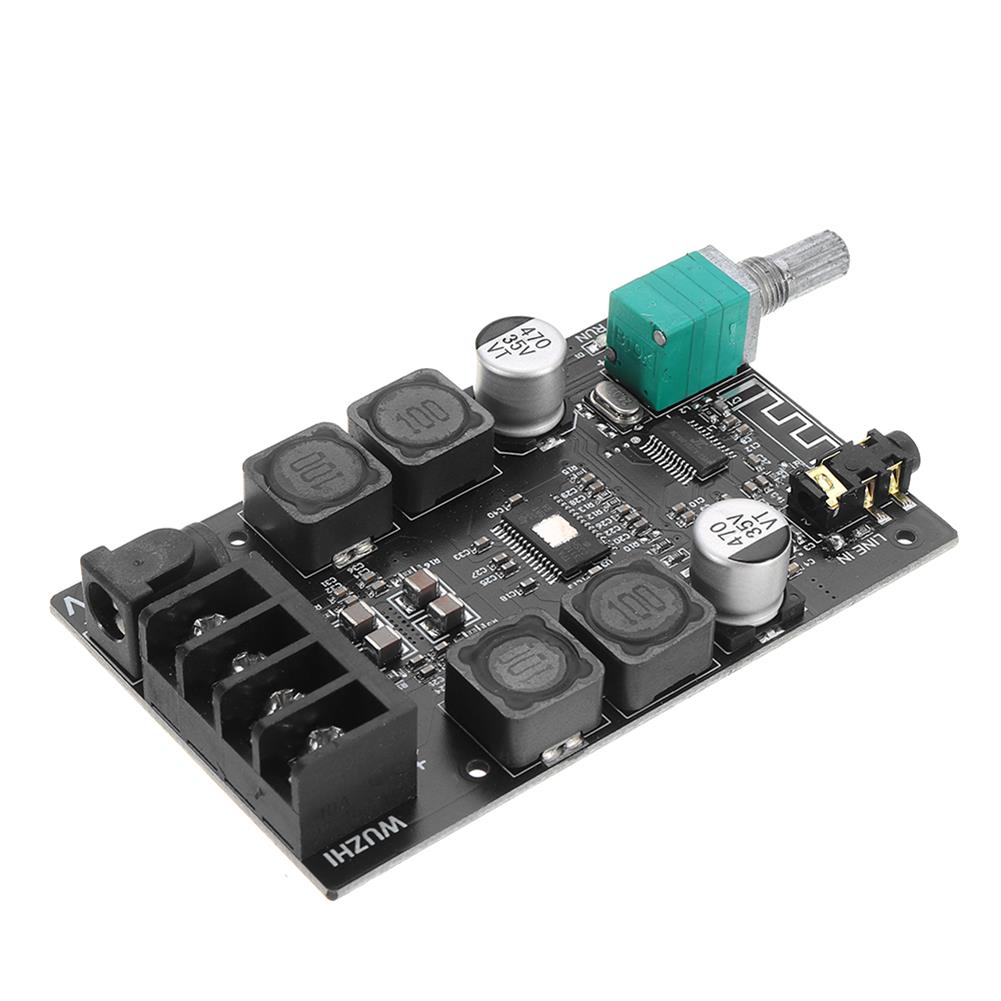
3pcs 2x50W TPA3116 AUX+Bluetooth 5.0 HIFI High Power Digital Amplifier Stereo Board AMP Amplificador Home theater without Shell
$54.90Amplifier BoardAdd to cartSpecificationsAudio input:AUX+bluetoothWork voltage:9-24 DCPower:2*50WCooling fin:LargeSpeaker:4-8Ω;30-200WProtection:Overvoltage,undervoltageSize:84*52*24mmFeatures1. This product is full of materials, featuring high performance and high performance price, especially for HIFI music power amplifier with high power and high fidelity.2. TPA3116D2 is a type D amplifier IC launched by TI company, which has very high index parameters.The maximum modulation frequency is 1.2MHZ, and the high …
5PCS USB To TTL Debug Serial Port Cable for Raspberry Pi 3B 2B / COM Port
$20.44Raspberry Pi & Orange PiAdd to cartMore info and driver, please !!!Supports WIN XP/WIN7/ WIN8/ WIN10Reference to WIN10, you can !!!NoteNo driver on raspberry pi 3 model bRaspberry Pi main board is not included!Package included5x USB To TTL Debug Serial Port Cable For Raspberry Pi / COM Port
DIY LED Light Kit ONLY for LEGO 60197 Passenger Train Building Block Bricks Lighting
$32.79DIY Electronic KitsAdd to cartSpecificationInterface:USBColor:As the picture shownThe product is just a light kit, not included the model!!!FitmentONLY For LEGO 60197 Passenger Train Building Block Bricks ToyFeaturesEasy to install.LED powered by USB.Make your model more cool.Package Included1 x LED Light Kit(Model Not Included)
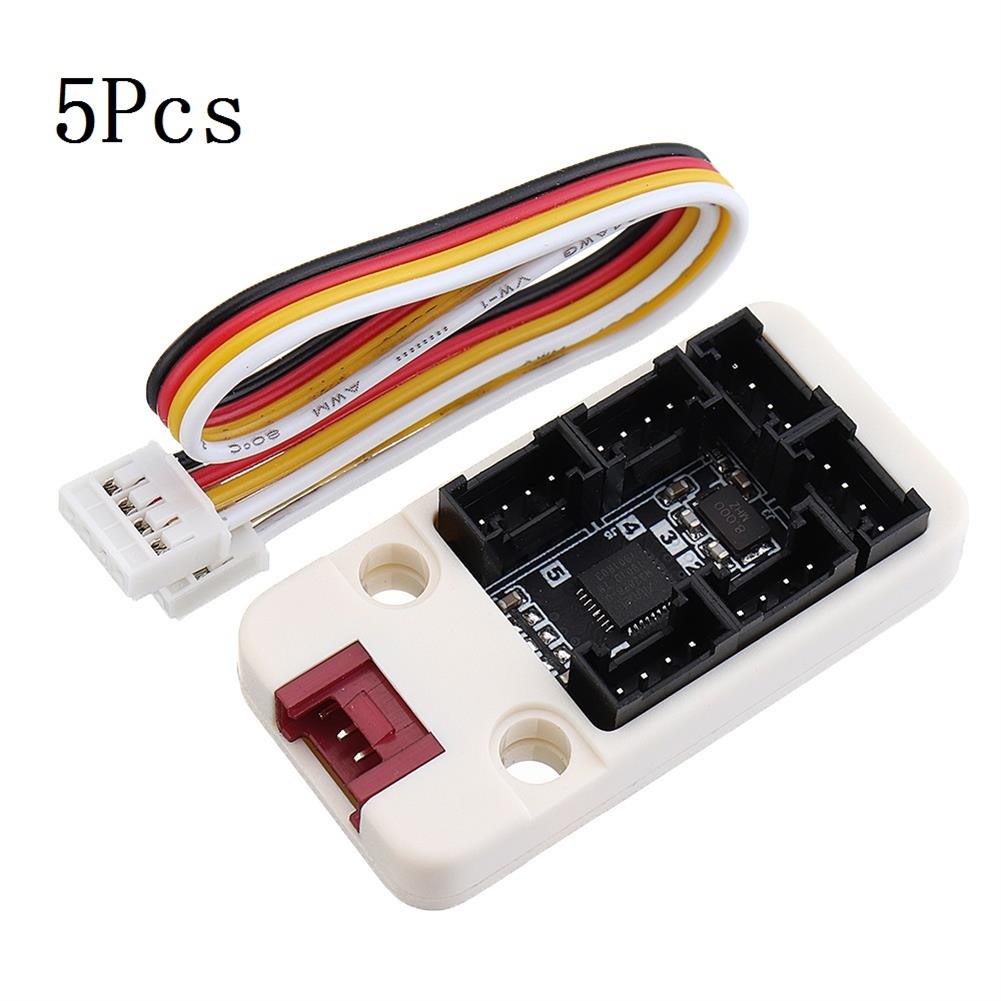
5Pcs M5Stack I/O Hub 1 to 6 Expansion Board Grove I/O interface for Blockly Development IoT MEGA328 Module for Arduino
$75.21Converter BoardAdd to cartDescriptionPbHUB, is a expander for singel-bus GROVE PORTB(Black port on M5GO Base). 1-to-6. PortB can be used as GPIO and analog in two data lines connected to GPIO36 and GPIO26 on ESP32. Same as PaHUB, it provides a solution for mutiple device control by PORTB. With PbHUB each of the IO can be configurated to …
10Pcs Green LED Power Symbol Momentary Latching Switch LED Light Push Button SPST
$20.86Electronic Accessories & SuppliesAdd to cart10Pcs Green LED Power Symbol Momentary Latching Switch LED Light Push Button SPSTDecriptionLatching type:Push it– on, push it again — offLED color:GreenSize(H*D):1.4 x 1cm / 0.55inch x 0.39inch (approx)Quantity:10 pcsFunction:MomentaryLED light voltage:3.2VSwitch voltage:12VMaximum operating current:20mAWith led light, with power symbol, light touch switchEasy to use and installNote1. Please check the picture and part number carefully …
10Pcs Green LED Power Symbol Momentary Latching Switch LED Light Push Button SPSTRead More
100Pcs Red Heat Shrink Solder Sleeve Seal Wire Splice Butt Connector AWG 22-18GA
$72.89ConnectorsAdd to cartName:(100) Heat Shrink Solder Sleeve Seal Wire Splice Butt Connector AWG 22-18GA RedMaterial:Tinned CopperColor:RedShrinking Ratio:2:1Working temperature:-55℃~125℃Shrink temperature:80℃Solder melting temperature:138℃Complete solder melting temperature:160℃Cable cross-section:0.5mm-1.0 mmDiameter:3mm/0.12inch(appr.)FeaturesPlacement on Vehicle:Left, Right, Front, Rear.Solder and seal and with advanced waterproof function.Polyolefin tubing in outside and hot melt adhesive in inside.Can be ideal used in marine and automobile applications.Improve pullout strength, …
100Pcs Red Heat Shrink Solder Sleeve Seal Wire Splice Butt Connector AWG 22-18GARead More


Reviews
There are no reviews yet.