


XH-M453 Dual Digital Display Temperature Humidity Controller thermostat Humidity Smart thermostat incubator Control AC 220V / DC12-24V
$32.79
Voltage 12-24V / Voltage AC220V /
Shipping:Standard Shipping about 10-25 business days
Secure Payment:Paypal,VISA,MasterCard
Specifications
Product model:XH-M453
Product specifications:DC12~24V/AC220V
Temperature range:-20~60C
Humidity range:0~100%RH
Control accuracy:÷0.1 C / 0.2%
Detection probe:integrated sensor
Output type:relay output
Output capacity:up to 10A
Product weight:about 150g
Appearance size:105*75*38mm
Embedded hole:81*57mm
Package Included
1 x XH-M453 Dual Digital Display Temperature Humidity Controller
1 x Sensor Cable
User Manal
1. Connect the power supply and temperature control humidity equipment correctly according to the wiring diagram. Pay attention to the temperature control and humidity control equipment. Do not connect the wrong ones. When connecting the DC12~24V power supply, distinguish the positive and negative poles. AC220V does not divide the zero fire line.
2. Stop the temperature setting
Press the SET button. When the red screen number starts to flash, press the up and down buttons to adjust the desired stop temperature. After setting, wait for 10 seconds without waiting for the system to automatically save the data.
3. Heating or cooling mode setting
Press and hold the up key, when the red screen displays C-0, press the setting button to enter the C-0 mode setting.
The down button switches between blue screens L and H, where L stands for heating and H stands for cooling. (Note:L when you pick up
The temperature-controlled load must be a heating device. When H, the load you connect must be a cooling device. ) set well
Wait 10 seconds, the system automatically saves the data.
4. Temperature difference setting
Press and hold the up key, when the red screen displays C-0, press the up and down keys to switch to the C-1 temperature difference setting, and then press
Set the temperature to the temperature difference setting, then press the up and down keys to adjust the temperature difference you want; set
Wait 10 seconds, the system automatically saves the data. (If the stop temperature is set to 35 C, the mode is set to L plus
In the hot mode, the temperature difference is set to 5, and the starting temperature is 35-5=30C, and the temperature control range is between 30~35C.
On the contrary, if the mode is set to H cooling mode, the starting temperature is 35+5=40C, and the temperature control range is
Between 35~40C)
5. Temperature calibration
Press and hold the up key, when the red screen displays C-0, press the up and down keys to switch to the C-2 temperature correction mode, press the set key to enter the calibration mode, and then press the up and down keys to adjust the difference you want. Value; if the actual temperature is 28 C, the probe detection temperature is 28.2 C, then the correction difference is set to -0.2; if the detection temperature is low, the correction difference can be increased. Wait 10 seconds after setting, the system automatically saves the data.
Temperature parameter code table
Code Name Setting range Default parameters
C-0 mode setting L heating H cooling L heating mode
C-1 temperature difference 0.1~50 C 2.0C
C-2 temperature calibration -10 and 10 C 0.0 C
6. Stop the temperature setting
Press the SET button, the red screen number starts to flash, and then press the SET button to switch to the blue screen number.
Blink, press the up and down keys to adjust the desired stop humidity value; do not wait after setting 10
In seconds, the system automatically saves the data.
7. Humidification or dehumidification mode setting
Press and hold the key, when the red screen displays H-0, press the setting button to enter the H-0 mode setting.
The down button performs switching between blue screens L and H, L for humidification and H for dehumidification. (Note:L when you pick up
The humidity control load must be a humidification device. When H is used, the load you are connected to must be a dehumidification device. ) set well
Wait 10 seconds, the system automatically saves the data.
8. Humidity difference setting
Press and hold the key, when the red screen displays H-0, press the up and down keys to switch to the H-1 humidity difference setting, press
Press the setting button to enter the humidity difference setting, press the up and down keys to adjust the setting you want, and set it.
Wait 10 seconds, the system automatically saves the data. (If the stop humidity is set to 50% RH, the mode is set to L plus
In wet mode, the humidity difference is set to 5% RH, the starting humidity is 50-5=45%RH, and the humidity control range is between 45~50%RH. On the contrary, if the mode is set to H dehumidification mode, the starting humidity is 50+. 5=55% RH, the humidity control range is between 50~55% RH)
9. Temperature calibration
Press and hold the key, when the red screen displays H-0, press the up and down keys to switch to the H-2 humidity correction mode.
Press the setting button to enter the calibration mode, press the up and down keys to adjust the setting difference; if the actual humidity is 56% RH,
The probe detects a humidity of 56.2% RH, and the correction difference is set to -0.2;
Low, just adjust the correction difference. Wait 10 seconds after setting, the system automatically saves the data.
Humidity parameter code table
Code Name Setting range Default parameters
H-0 mode setting L humidification H dehumidification L humidification mode
H-1 Humidity difference 0.1~50%RH 10%RH
H-2 Humidity Calibration -10 and 10%RH 0.0%RH
10. Restore factory settings
Press and hold the up and down keys for 5 seconds at the same time. When the screen displays 888, the factory will be restored.
| Weight | 0.154 kg |
|---|
Related products
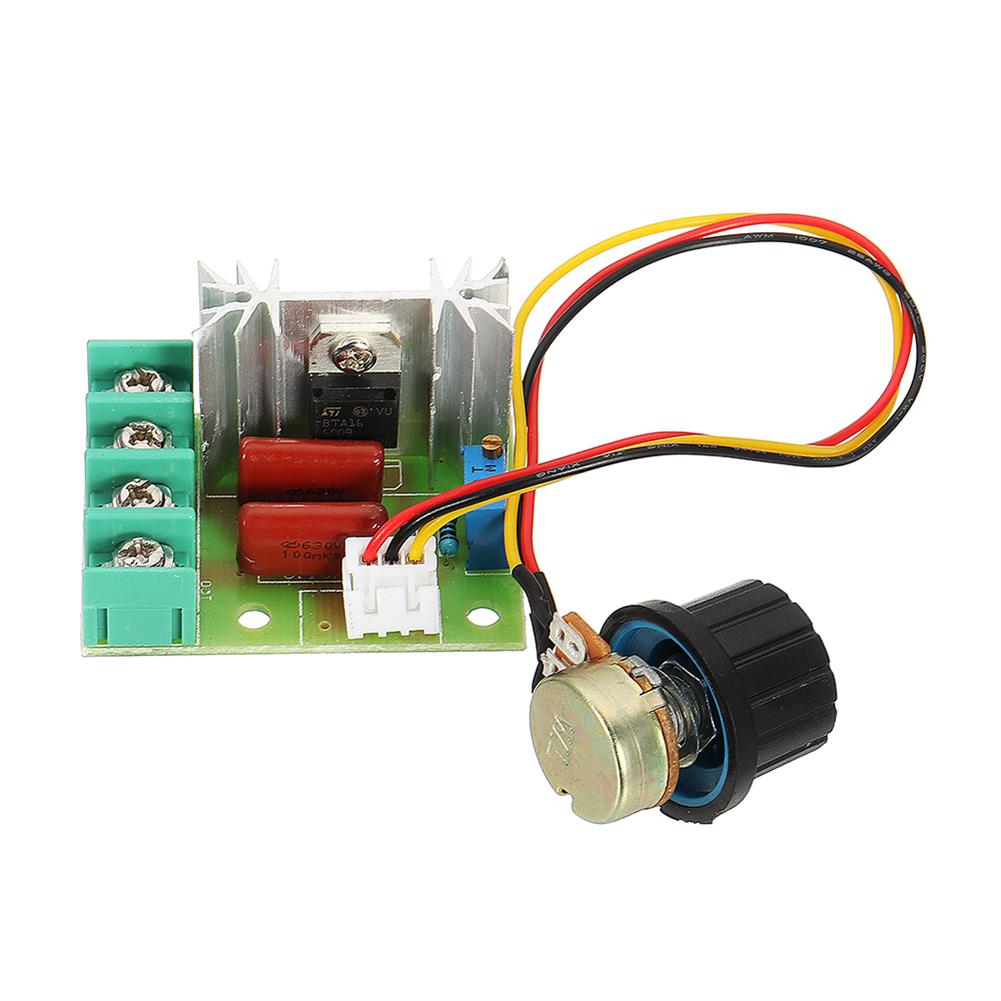
5pcs 2000W Thyristor Governor Motor 220V Regulating Dimming thermostat Module External Potentiometer Voltage Adjustable
$19.99Test & Measuring ModuleAdd to cartTips:This product needs to be connected to the load to adjust voltage, such as old-fashioned incandescent lamps or fans!FeatureUse voltage:AC 220VMaximum power:2000WVoltage regulation:AC 50-220VSpecification size:High temperature resistant FR-4 circuit board Circuit board size:about 36 x 48mmOuter size:48 x 60mm (knob direction) x 28mm (high)Control silicon withstand voltage up to 1200 volts / current 25A1.6mm thick …
10pcs 2000W Thyristor Governor Motor 220V Regulating Dimming thermostat Module External Potentiometer Voltage Adjustable
$35.56Test & Measuring ModuleAdd to cartTips:This product needs to be connected to the load to adjust voltage, such as old-fashioned incandescent lamps or fans!FeatureUse voltage:AC 220VMaximum power:2000WVoltage regulation:AC 50-220VSpecification size:High temperature resistant FR-4 circuit board Circuit board size:about 36 x 48mmOuter size:48 x 60mm (knob direction) x 28mm (high)Control silicon withstand voltage up to 1200 volts / current 25A1.6mm thick …
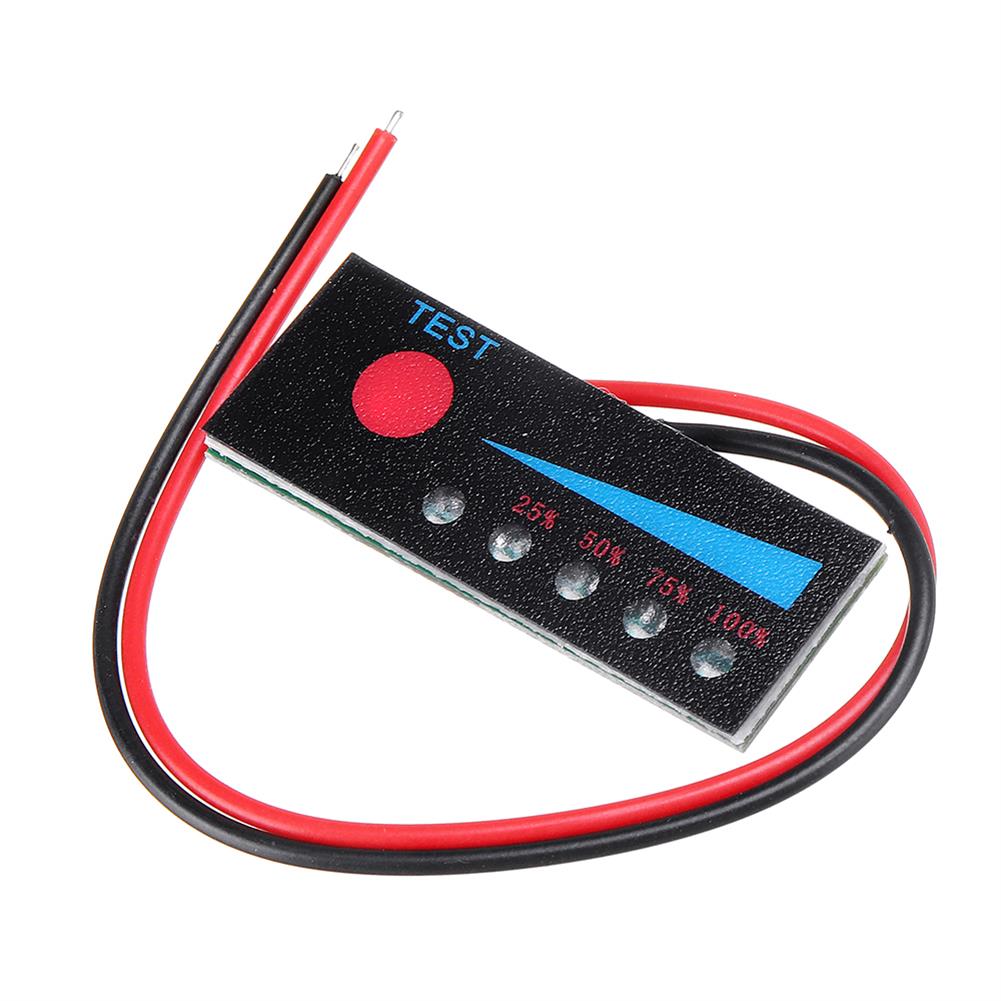
3.7V 1-7S Li-ion Lithium Battery 12-48V LiFePO4 Battery Power indicator Board 12V Car Lead Acid Battery Level Capacity Meter with Reverse Connection
$4.36Test & Measuring ModuleAdd to cartBattery 1S / Battery 2S / Battery 3S / Battery 4S / Battery 5S / Battery 6S / Battery 7S / Battery 12V / Battery 24V / Battery 36V / Battery 48V /
20pcs 2000W Thyristor Governor Motor 220V Regulating Dimming thermostat Module External Potentiometer Voltage Adjustable
$67.46Test & Measuring ModuleAdd to cartTips:This product needs to be connected to the load to adjust voltage, such as old-fashioned incandescent lamps or fans!FeatureUse voltage:AC 220VMaximum power:2000WVoltage regulation:AC 50-220VSpecification size:High temperature resistant FR-4 circuit board Circuit board size:about 36 x 48mmOuter size:48 x 60mm (knob direction) x 28mm (high)Control silicon withstand voltage up to 1200 volts / current 25A1.6mm thick …


Customers Also Viewed
OpenMV OpenMV3 4 2 Camera Module M7 H7 LCD Expansion Board Display Screen Module
$50.02Display ScreenAdd to cartnullFeatureThe LCD Shield gives your OpenMV Cam the ability to display what it sees on-the-go while not connected to your computer. It features a 1.8inch 128×160 16-bpp (RGB565) TFT LCD display with a controllable backlight. Your OpenMV Cam’s firmware has built-in support for controlling the LCD Shield using the LCD module.ApplicationsThe LCD Shield is great …
OpenMV OpenMV3 4 2 Camera Module M7 H7 LCD Expansion Board Display Screen ModuleRead More
3pcs MFRC-522 RC522 RFID RF IC Card Reader Sensor Module Solder 8P Socket
$10.96Sensor & Detector ModuleAdd to cartIntroduction to the RFID moduleThe MF522-AN module adopts MFRC522 original chip design card reader circuit, which is easy to use and low in cost. It is suitable for users of advanced applications such as device development and card reader development, and users who need to design/produce RF card terminals. This module can be directly loaded …
3pcs MFRC-522 RC522 RFID RF IC Card Reader Sensor Module Solder 8P SocketRead More
Transparent Acrylic Sheet Housing Module Case for DSO138 Oscilloscope
$17.48DIY Electronic KitsAdd to cartFeatureThis product is for DSO138 Oscilloscope only. (Product ID:984002, 969762)Color:TransparentMaterial:AcrylicInstallation size:12.7 x 8.7 x 2.6 (L*W*H)Note:Package does not includes the DSO138 Oscilloscope.Instruction:Click to openPackage includes1 x DSO138 Transparent Acrylic Sheet
20Pcs 3V 650nM 5mW Line Laser Diode Module
$41.34Module ComponentsAdd to cartDescriptionSpot mode:line(Continuous output)Dimensions:diameter 9mm x length 23mmLaser working life:5000-10000 hours or moreLaser wavelength:650nmOutput power:5mWOperating voltage:DC3VWorking current:16mA ~ 20mAWorking temperature:-36 → ~ 65 →Storage temperature:-36 → ~ 65 →Level:sub-industrial gradeColor:red lightMaterial:brassApplication(1) industrial grade:can be used for equipment, health care, military, Kam pseudo security, stage lighting, tools, U disk, mobile phone, projection teaching flip pen, warm measuring …
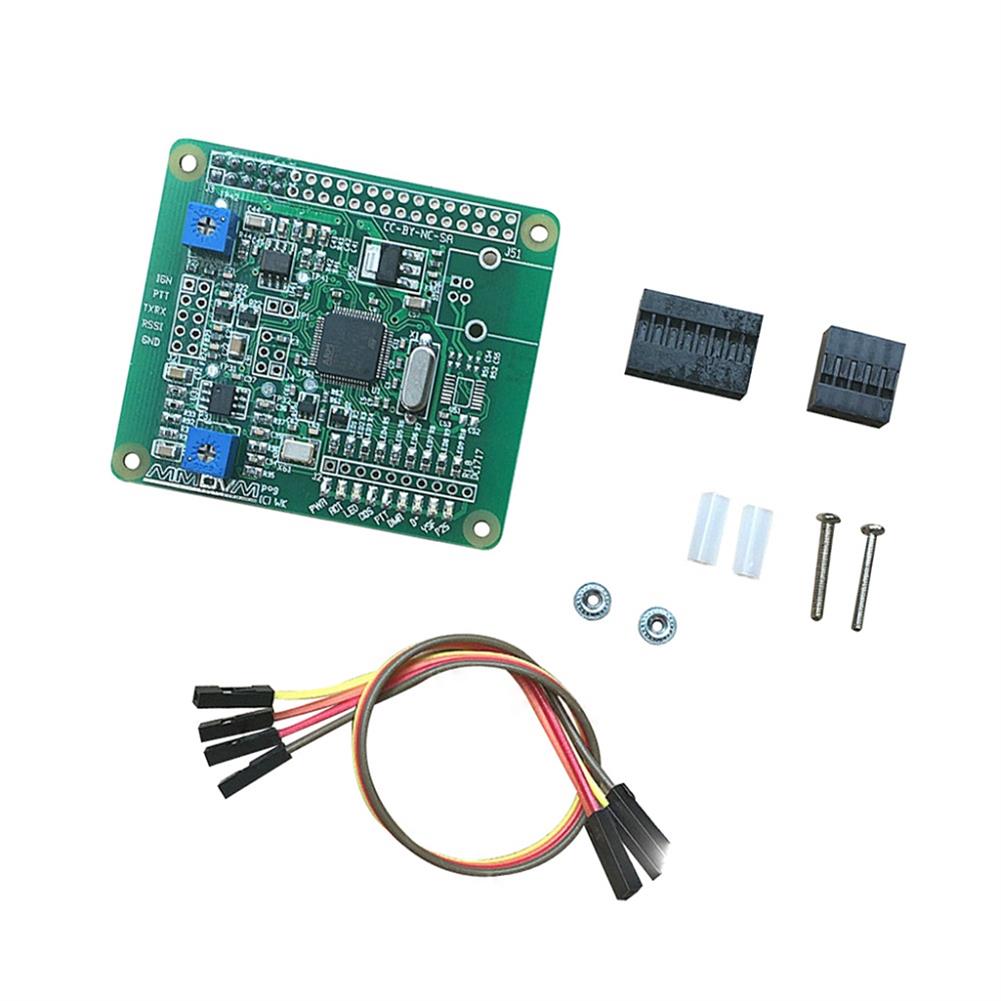
MMDVM Open-Source Multi-Mode Digital Voice Modem DIY Kit Expansion Board for Raspberry Pi
$103.03Raspberry Pi & Orange PiAdd to cartDescription– This board could cooperate Raspberry Pi , Orange Pi, a variety of school development board to use.– Board has been applied in the GM300 GM3188 3688 950I 338 Vitex DR-1X, other types of repeaters and car stations need to be studied yourself.– The MMDVM is intended to be an open-source Multi-Mode Digital Voice Modem,which …
MMDVM Open-Source Multi-Mode Digital Voice Modem DIY Kit Expansion Board for Raspberry PiRead More
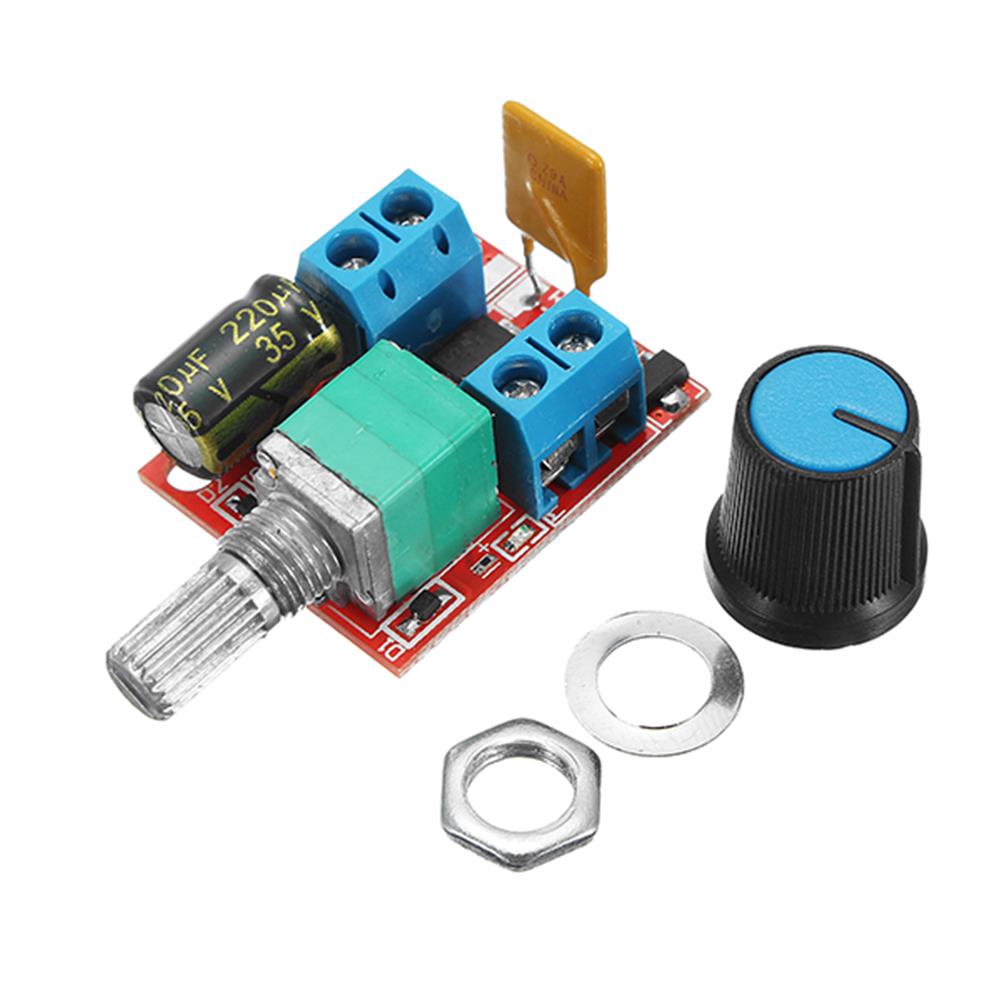
3Pcs 5V-30V DC PWM Speed Controller Mini Electrical Motor Control Switch LED Dimmer Module
$10.04Other Module BoardAdd to cartFeaturePWM DC motor speed controller is a very safe product.When the situation is overcurrent, it will disconnect by itself. after cooling off a few seconds, the fuse will recovery automatically.With high voltage and high current resettable fuseMini but usefulSpecificationOperating voltage:DC 5-30VControl power:90W (maximum)Quiescent current:0.015A (standby)PWM duty cycle:1% -100%PWM frequency:10khzSize:29mm*23mm (excluding handles)Total height:15mmKnob color:Send randomlyPackage included3 …
3Pcs 5V-30V DC PWM Speed Controller Mini Electrical Motor Control Switch LED Dimmer ModuleRead More


Reviews
There are no reviews yet.