


3pcs XH-W1321 0.1 Digital thermostat Mini Embedded Red Digital Display Switch Temperature Controller with Waterproof NTC Sensor Meter
$30.89
Shipping:Standard Shipping about 10-25 business days
Secure Payment:Paypal,VISA,MasterCard
Specifications
Product Name:Miniature embedded digital display thermostat
Product Model:XH-1321
Material:ABS
Case Color:White
LED Color:Red
Input Voltage:DC12V
Temperature Measurement Range:-50-110→
Temperature Control Range:-50-110→
Control Accuracy:0.1→
Display Accuracy:0.1→
Measuring Input:NTC10K Waterproof Probe L=1 Meter
Output Type:Relay Output(Output Switch)
Output Capacity:10A
Size (Length x Width x Height):about 56 x 38 x 32mm (2.17 x 1.50 x 1.26 Inch )
Opening hole size:46 x 34mm
Key Function
SET:Press once during normal use, directly enter the stop temperature setting state, use the up and down keys to set the required stop temperature, long press to enter the internal setting menu.
UP:After long press the setting button to enter the internal setting, increase the value setting by the up button.
DOWN:After long press the setting button to enter the internal setting, use the up button to decrease the value setting.
Code:Description:Setting range (method):Factory settings
P0:Operating mode:H/C:C
P1:Backlash setting:0.1-50:2
P2:Temperature correction:-9.9~+9.9°C:0
P3:Delayed start:0-9:0
Detailed Code Descriptions
P0:Working mode:This value must be set when the thermostat is used for the first time. If it is used for heating heating, set to H, if it is used for cooling cooling, set to C.
P1:Hypothesis setting:Press and hold the setting button for 3 seconds to enter the internal menu, select P1, and press the setting button again to enter the hysteresis value setting state. The hysteresis is the difference required when the thermostat reaches the set temperature and stops working again. For example, it is set to the heating mode. When it is heated to 40 degrees, it stops at 35 degrees and starts to return. The difference is 5
P2:Temperature correction:Press and hold the setting button for 3 seconds to enter the internal menu. Press the up and down keys to select P2, press the setting button again, and set the required calibration temperature by the up and down keys. In the setting, if the detected temperature value is 0.5 °C larger than the actual temperature value, the calibration temperature to be set is -0.5 °C. If the detected temperature value is 1 °C smaller than the actual temperature value, the calibration temperature to be set is 1 °C, and the detection temperature +-calibration temperature = actual temperature.
P3:Delay start:Press and hold the setting button for 3 seconds to enter the internal menu, select P3 by the up and down keys, press the setting button again, and set the required delay time (minutes) by the up and down keys. The delay start is generally used for compressor refrigeration. If it is used in the refrigerator freezer, this value needs to be set. According to the compressor back pressure, the set value is usually 3-6 minutes, if it is not used to control the compressor or no delay. Function, skip this item directly.
Instructions
Set the difference back:Why set the backlash setting When you control the device, the temperature will rise or fall back. How many degrees does the temperature change If you want the temperature to change by 10°, the device needs to set the difference back to 10. By setting the difference back, the device can cycle through the temperature range.
Set the stop temperature:press the set button once in the normal display state to stop the temperature value flashing. You can set the desired stop temperature value by using the up and down keys.
How to set factory settings are restored:Press and hold the up and down keys while the power is on, the digital tube display 888 will then automatically jump to the detection temperature.
Heating mode setting method
Setup steps
The first step is to set P0=H
The second step sets the stop temperature
The third step sets the hysteresis value
Setting method
1. Press and hold the setting button to enter the internal menu and set P0 to H.
2. Press the setting button to stop the temperature flashing, and the up and down keys to set the temperature.
3. Press and hold the setting button to enter the internal menu and set the P1 hysteresis setting.
Use Cases
Control the water heater, heat it to 65 ° C to stop, the temperature drops back to 50 ° C and start heating again, how to set
Step 1:Determine the working mode as heating mode and set P0 to H
Step 2:Press the setting button to stop the temperature flashing. Set the starting temperature to 50 °C with the up and down keys.
The third step:stop at 65 °C, start again at 50 °C, so the return difference needs to be set to 65-50=15, enter the internal menu and set P1 to 15, the heating case is set!
Cooling mode setting mode
Setup steps
The first step is to set P0=C
The second step sets the stop temperature
The third step sets the hysteresis value
Setting method
Press and hold the setting button to enter the internal menu and set P0 to C.
Press the setting button to stop the temperature flashing, and the up and down keys to set the temperature.
Long press the setting button to enter the internal menu, set the P1 backlash setting
Use Cases
Control the farm, ventilate to 26 ° C to stop, the temperature rises to 28 ° C to start the refrigeration again, how to set up
The first step:determine the working mode is cooling mode, set P0 to C
Step 2:Press the SET button to stop the temperature flashing. Set the stop temperature to 28 °C with the up and down keys.
The third step:stop at 26 ° C, start again at 28 ° C, so the return difference needs to be set to 28-26 = 2, enter the internal menu to set P1 to 2, the cooling case is set!
Package includes
3 x Miniature embedded digital display thermostat
| Weight | 0.138 kg |
|---|
Related products
10pcs thermal Sensor Module Temperature Switch thermistor Sensor Board
$10.88Sensor & Detector ModuleAdd to cartUsesTemperature detection, temperature control sensors , ambient temperature detectionFeatures1. Using the NTC thermistor sensor, good sensitivity2. The comparator output signal is clean, good waveform, driving ability, more than 15mA.3. Adjust the temperature distribution position detection threshold4. The working voltage 3.3V-5V5. The output format:digital switching outputs ( 0 and 1 )6. Fixed bolt holes for easy …
10pcs thermal Sensor Module Temperature Switch thermistor Sensor BoardRead More
Waterproof Ultrasonic Sensor Module integrated Ranging Sensor Reversing Radar Measuring Distance
$24.04Sensor & Detector ModuleAdd to cartThis module is easy to use. A control port sends a high level above 10US, so you can wait for the high level output at the receiving port. You can turn on the timer when there is an output. When this port goes low, you can read it. The value of the timer, at this …
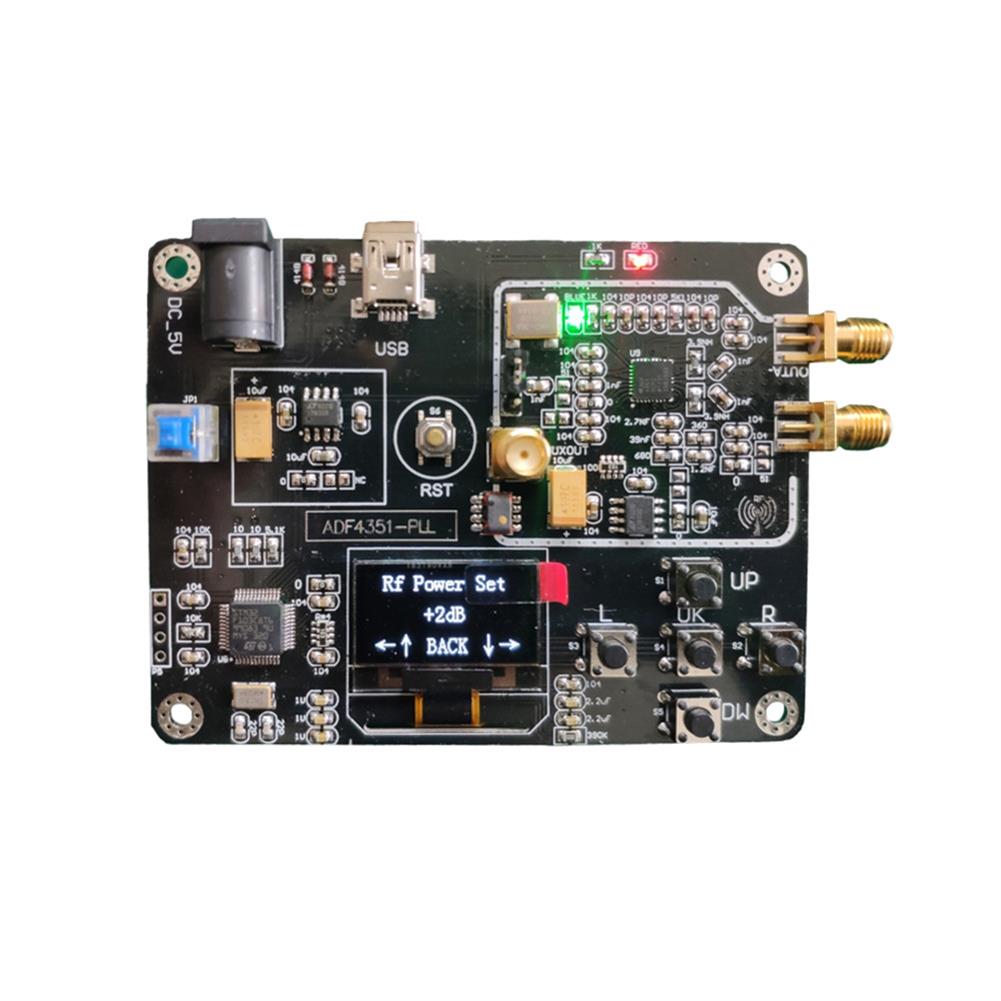
Geekcreit Signal Generator Module 35M-4.4GHz RF Signal Source Frequency Synthesizer ADF4351 Development Board
$54.66Sensor & Detector ModuleAdd to cartThe Source code:Click here to openSchematic:Click here to openHighlightsWith OLED displayHost computer USB & serial portIntegrated key operationWide range voltage supplyGood man-machine interface Many improvements on the phase noise, phase spurious and loop filterMuch enhancement on the power filter and ground processingModule can achieve 35MHz – 4.4GHz frequency output, point frequency, sweep, frequency hopping and …
30pcs thermal Sensor Module Temperature Switch thermistor Sensor Board
$27.45Sensor & Detector ModuleAdd to cartUsesTemperature detection, temperature control sensors , ambient temperature detectionFeatures1. Using the NTC thermistor sensor, good sensitivity2. The comparator output signal is clean, good waveform, driving ability, more than 15mA.3. Adjust the temperature distribution position detection threshold4. The working voltage 3.3V-5V5. The output format:digital switching outputs ( 0 and 1 )6. Fixed bolt holes for easy …
30pcs thermal Sensor Module Temperature Switch thermistor Sensor BoardRead More


Customers Also Viewed
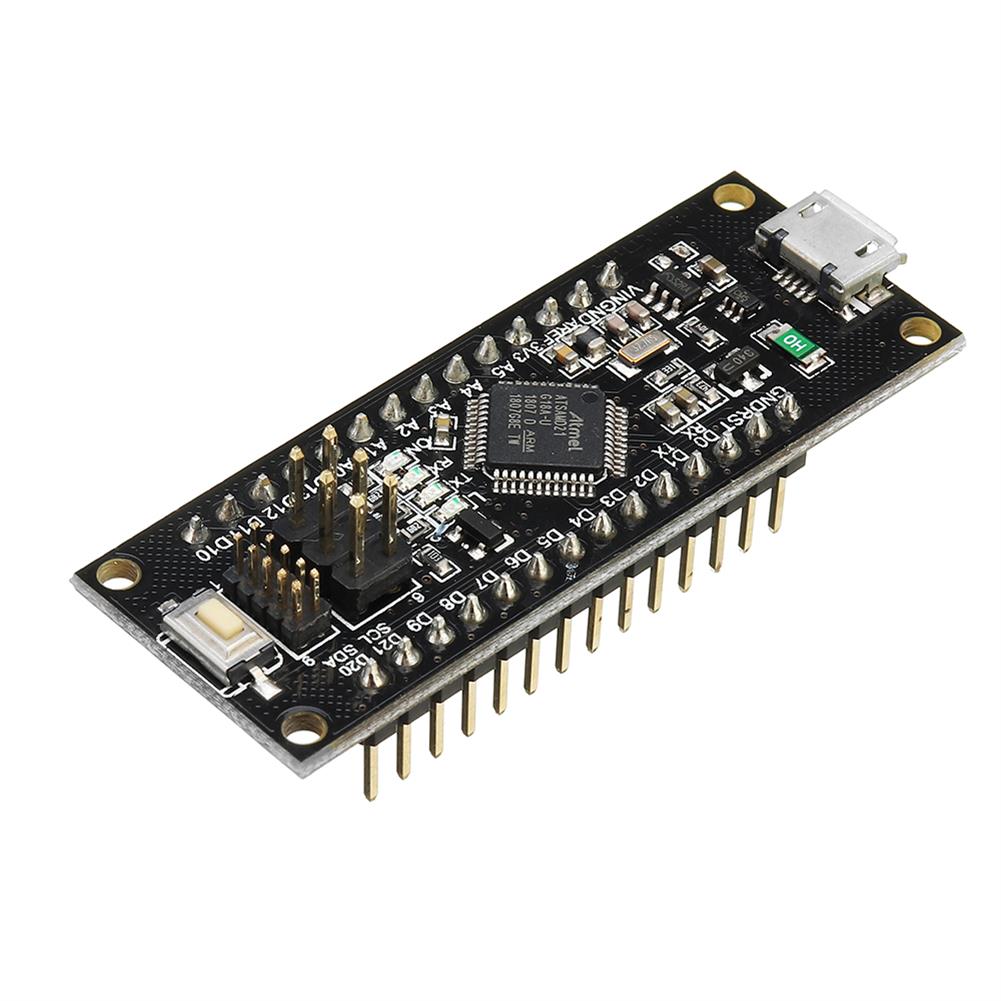
Robotdyn SAMD21 M0-Mini 32 Bit ARM Cortex M0 Core 48 MHz Pins Soldered Development Board
$38.30Motherboard & Development BoardAdd to cartDimensional drawing:Click to openPinout:Click to openSchematic:Click to openTechnical ParametersMicrocontroller:ATSAMD21G18 48pins LQFPUSB-TTL converter:SAMD21 MCUPower Out:3.3V-800mAPower IN. USB:5VPower IN. VIN/DC Jack:5VPower Consumption:3.3V 220mALogic Level:3.3VUSB:Micro USBClock Frequency:48MHzOperating Supply Voltage:3.3VDigital I/O:20(7-PWM)Analog I/O:6Data RAM Type/Size:20KbData ROM Type/Size:128KbInterface Type:ISPOperating temperature:−40㎡°/+85㎡°Length*Width:56.5*18mmFeatureThe RobotDyn SAMD21 M0-Mini represents a powerful, 32-bit extension of the Ard-uino U NO platform, but to small size like Micro or …
Robotdyn SAMD21 M0-Mini 32 Bit ARM Cortex M0 Core 48 MHz Pins Soldered Development BoardRead More
CDCPH Super Capacitor 16v16.6f Automotive Rectifier Farad Capacitor instead of 16v20f
$32.43Electronic Accessories & SuppliesAdd to cartDescriptionVoltage:15-16 VCapacity:16.6 to 18 FWorking Temperature:-20-70 →Volume:62 Long 120 * Height * Thick 20MMMain performance:low ESR feature, large current can replace the battery.Package included1 x 16V16. 6F Supercapacitor
5pcs 5V USB Cooling Fan Governor LED Dimming Module Low Power Timer Board without Shell
$31.91Test & Measuring ModuleAdd to cartSize ConversionInchesCentimetersPlease according to your own measurements to choose your suitable size. The tags inside the items will show in our Asian (Type) size.Product Highlights1.With soft-start function, the output voltage increases slowly and there is no inrush current, which can effectively extend the life of the fan motor or LED tube.2.The NC voltage regulation is …
5pcs 5V USB Cooling Fan Governor LED Dimming Module Low Power Timer Board without ShellRead More
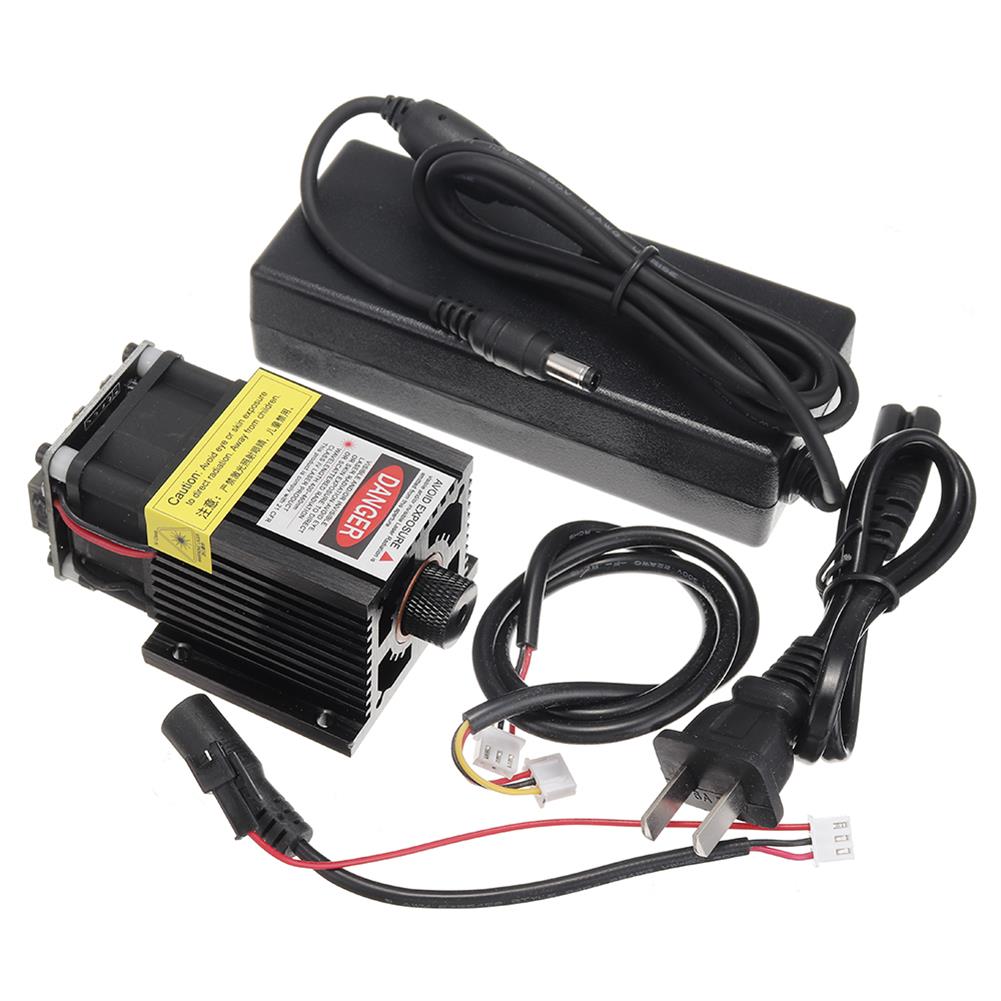
T05-5500 5500mW 445nm Blue Laser Module TTL&PWM Modulation 2.54-3P+2.54-2P for EleksMaker DIY Laser Engraver
$263.24Laser ModuleAdd to cartSpecificationGeneral Specification Model:T05 Heatsink Material:Aircraft Aluminum Luminous Color:Blue Section Size:43mm x 43mm Cooling Mode:Heat Sink Groove, Cooling Fan Dimension:76 * 43 * 43mm Adapter Plug:US Plug Adapter Input Voltage:AC 100-240V Adapter Output Voltage:DC 12V 5A Can Engrave:MDF/Balsa/Paper/Wood/Fabric/Plastic/Leather/Plywood/Foam Paper/Anodized Aluminum Can Not Engrave:Metal/Glass/Stone/Ceramics/Stainless Steel/Reflective Material/ Transparent Material Technical Parameters Laser Power:5500mW Wavelength:445nm Beam Shape:Dot (Focusable) Working …
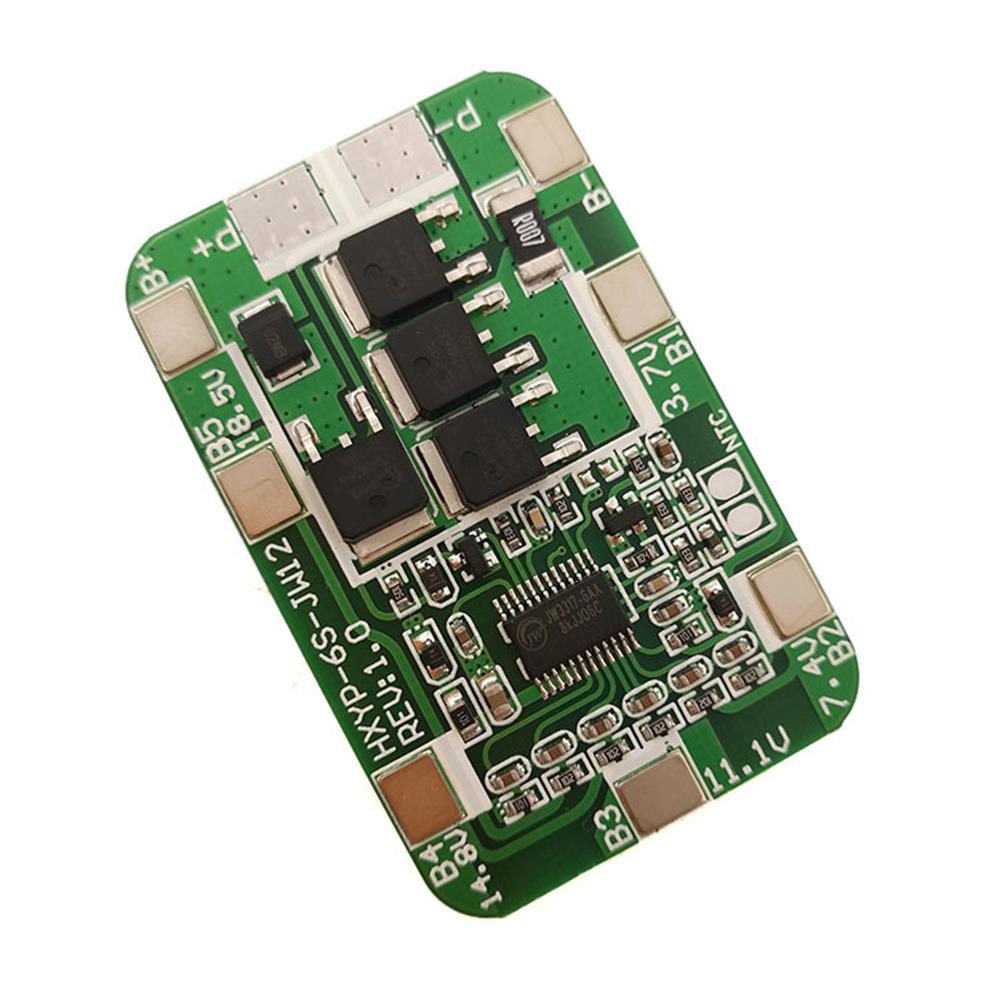
6S-JW12 6S 22.2V Polymer 18650 Lithium Battery Protection Board 14A Working Current 25.2V without Balanced
$5.79Battery Protection ModuleAdd to cartSpecificationContinuous discharge current:14AInstant discharge current:22ALithium battery charger:25.2VCharging current:25 (max)AOvercharge detection voltage:4.28 ÷0. 05 V single coreOvercharge protection delay:0.5SOvercharge release voltage:4. 08 + 0. 05V single coreOver-discharge detection voltage:2.55 + 0.08VOver-discharge detection delay:0.1SOver-discharge release voltage:2.9÷0.1VOvercurrent detection voltage:150mVOvercurrent detection delay:10mSOvercurrent protection current:75÷5 AOvercurrent protection release condition:disconnect the loadShort-circuit protection conditions:external load short-circuitShort circuit detection delay:250uSShort-circuit protection release …


Reviews
There are no reviews yet.