


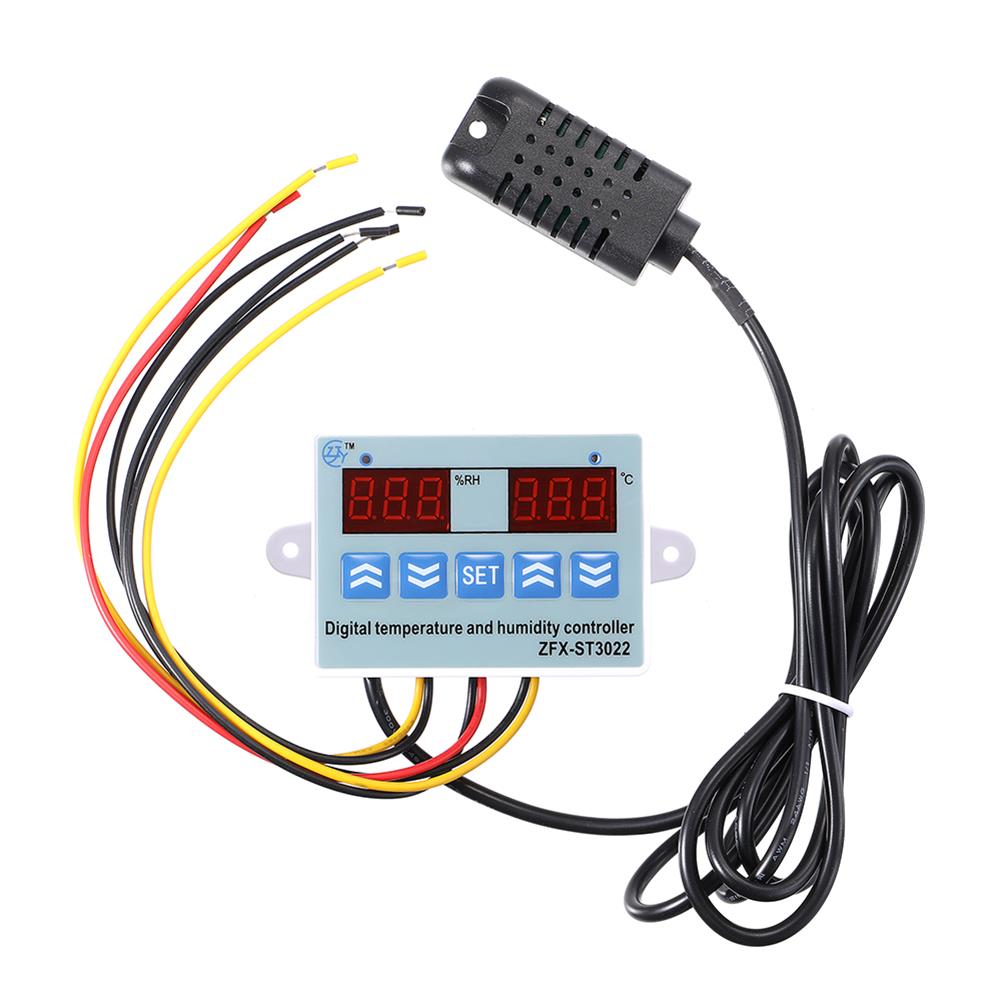
3pcs XH-W1321 0.1 Digital thermostat Mini Embedded Blue Digital Display Switch Temperature Controller with Waterproof NTC Sensor Meter
$30.89
Shipping:Standard Shipping about 10-25 business days
Secure Payment:Paypal,VISA,MasterCard
Specifications
Product Name:Miniature embedded digital display thermostat
Product Model:XH-1321
Material:ABS
Case Color:White
LED Color:Blue
Input Voltage:DC12V
Temperature Measurement Range:-50-110→
Temperature Control Range:-50-110→
Control Accuracy:0.1→
Display Accuracy:0.1→
Measuring Input:NTC10K Waterproof Probe L=1 Meter
Output Type:Relay Output(Output Switch)
Output Capacity:10A
Size (Length x Width x Height):about 56 x 38 x 32mm (2.17 x 1.50 x 1.26 Inch )
Opening hole size:46 x 34mm
Key Function
SET:Press once during normal use, directly enter the stop temperature setting state, use the up and down keys to set the required stop temperature, long press to enter the internal setting menu.
UP:After long press the setting button to enter the internal setting, increase the value setting by the up button.
DOWN:After long press the setting button to enter the internal setting, use the up button to decrease the value setting.
Code:Description:Setting range (method):Factory settings
P0:Operating mode:H/C:C
P1:Backlash setting:0.1-50:2
P2:Temperature correction:-9.9~+9.9°C:0
P3:Delayed start:0-9:0
Detailed Code Descriptions
P0:Working mode:This value must be set when the thermostat is used for the first time. If it is used for heating heating, set to H, if it is used for cooling cooling, set to C.
P1:Hypothesis setting:Press and hold the setting button for 3 seconds to enter the internal menu, select P1, and press the setting button again to enter the hysteresis value setting state. The hysteresis is the difference required when the thermostat reaches the set temperature and stops working again. For example, it is set to the heating mode. When it is heated to 40 degrees, it stops at 35 degrees and starts to return. The difference is 5
P2:Temperature correction:Press and hold the setting button for 3 seconds to enter the internal menu. Press the up and down keys to select P2, press the setting button again, and set the required calibration temperature by the up and down keys. In the setting, if the detected temperature value is 0.5 °C larger than the actual temperature value, the calibration temperature to be set is -0.5 °C. If the detected temperature value is 1 °C smaller than the actual temperature value, the calibration temperature to be set is 1 °C, and the detection temperature +-calibration temperature = actual temperature.
P3:Delay start:Press and hold the setting button for 3 seconds to enter the internal menu, select P3 by the up and down keys, press the setting button again, and set the required delay time (minutes) by the up and down keys. The delay start is generally used for compressor refrigeration. If it is used in the refrigerator freezer, this value needs to be set. According to the compressor back pressure, the set value is usually 3-6 minutes, if it is not used to control the compressor or no delay. Function, skip this item directly.
Instructions
Set the difference back:Why set the backlash setting When you control the device, the temperature will rise or fall back. How many degrees does the temperature change If you want the temperature to change by 10°, the device needs to set the difference back to 10. By setting the difference back, the device can cycle through the temperature range.
Set the stop temperature:press the set button once in the normal display state to stop the temperature value flashing. You can set the desired stop temperature value by using the up and down keys.
How to set factory settings are restored:Press and hold the up and down keys while the power is on, the digital tube display 888 will then automatically jump to the detection temperature.
Heating mode setting method
Setup steps
The first step is to set P0=H
The second step sets the stop temperature
The third step sets the hysteresis value
Setting method
1. Press and hold the setting button to enter the internal menu and set P0 to H.
2. Press the setting button to stop the temperature flashing, and the up and down keys to set the temperature.
3. Press and hold the setting button to enter the internal menu and set the P1 hysteresis setting.
Use Cases
Control the water heater, heat it to 65 ° C to stop, the temperature drops back to 50 ° C and start heating again, how to set
Step 1:Determine the working mode as heating mode and set P0 to H
Step 2:Press the setting button to stop the temperature flashing. Set the starting temperature to 50 °C with the up and down keys.
The third step:stop at 65 °C, start again at 50 °C, so the return difference needs to be set to 65-50=15, enter the internal menu and set P1 to 15, the heating case is set!
Cooling mode setting mode
Setup steps
The first step is to set P0=C
The second step sets the stop temperature
The third step sets the hysteresis value
Setting method
Press and hold the setting button to enter the internal menu and set P0 to C.
Press the setting button to stop the temperature flashing, and the up and down keys to set the temperature.
Long press the setting button to enter the internal menu, set the P1 backlash setting
Use Cases
Control the farm, ventilate to 26 ° C to stop, the temperature rises to 28 ° C to start the refrigeration again, how to set up
The first step:determine the working mode is cooling mode, set P0 to C
Step 2:Press the SET button to stop the temperature flashing. Set the stop temperature to 28 °C with the up and down keys.
The third step:stop at 26 ° C, start again at 28 ° C, so the return difference needs to be set to 28-26 = 2, enter the internal menu to set P1 to 2, the cooling case is set!
Package includes
3 x Miniature embedded digital display thermostat
| Weight | 0.132 kg |
|---|
Related products
6mA 3-100CM Adjustable infrared Digital Obstacle Avoidance Sensor Module
$8.37Sensor & Detector ModuleAdd to cartSpecificationsWorking voltage:DC 3.8V-5.5VWorking current (5V):typical current 6mAInput and output signals (3 lines):GND, VCC is power, and VCC is 3.8V-5.5VObstacle detection time (range from obstacle-free to obstacle-free or obstacle-free to obstacle-free)Working Principle:Sensors actively emit infrared light, according to reflected light detection, if detected obstacles, OUT foot output 0, otherwise 1.Detection distance (test environment, indoor, maximum power, …
6mA 3-100CM Adjustable infrared Digital Obstacle Avoidance Sensor ModuleRead More
TCRT5000 infrared Reflective Switch IR Barrier Line Track Sensor Module
$4.36Sensor & Detector ModuleAdd to cartTCRT5000 Infrared Reflective Switch IR Barrier Line Track Sensor ModuleFeaturesTCRT5000 sensor of infrared emission diode constantly launch infrared, the infrared ray is emitted when the intensity of reflected back has not been reflected or but is not big enough, the light activated triode has been in the off state, the output end of the module …
TCRT5000 infrared Reflective Switch IR Barrier Line Track Sensor ModuleRead More
5pcs 6mA 3-100CM Adjustable infrared Digital Obstacle Avoidance Sensor Module
$36.94Sensor & Detector ModuleAdd to cartSpecificationsWorking voltage:DC 3.8V-5.5VWorking current (5V):typical current 6mAInput and output signals (3 lines):GND, VCC is power, and VCC is 3.8V-5.5VObstacle detection time (range from obstacle-free to obstacle-free or obstacle-free to obstacle-free)Working Principle:Sensors actively emit infrared light, according to reflected light detection, if detected obstacles, OUT foot output 0, otherwise 1.Detection distance (test environment, indoor, maximum power, …
5pcs 6mA 3-100CM Adjustable infrared Digital Obstacle Avoidance Sensor ModuleRead More


Customers Also Viewed
10pcs 4 Digit LED Display Tube 7 Segments TM1637 50x19mm Blue Clock Display Colon RobotDyn for Arduino – products that work with official for Arduino Boards
$87.47Display ScreenAdd to cartFeatureThis is a basic 4-digit 7-segment display module.The display features double points in midle. The decimal point per digit not active.Module connecting to digital I/O on 2 pins.For Arduino use library:TM1637.hPackage includes10 x LED Display TubeSketch include ‘TM1637.h’ // include the TM1637 libraryTM1637 display(2, 3);// // initialize the library for pins 2, 3void setup()void loop()
10pcs WL102 433MHz Wireless Remote Control Transmitter Module ASK/OOK for Smart Home
$38.58Smart ModuleAdd to cartFeaturesThe WL102 transmitter module is a UHF ASK modulation transmitter that supports ASK and OOK modulation. The transmitting module integrates a PLL circuit and an ASK analog modulation circuit, and has a high degree of integration and the like, and can be applied to short-range wireless communication. The transmission frequency is greater than 11dBm.– Support …
10pcs WL102 433MHz Wireless Remote Control Transmitter Module ASK/OOK for Smart HomeRead More
5PCS FR4 180x120mm Single Side Copper Clad Laminate PCB Circuit Board CCL
$16.39Electronic Accessories & SuppliesAdd to cartSpecificationPanel Size:Approx.180mm x 120mm or 7.09′ x 4.73′ (inch)Thickness:0.06′ ÷0.005 (1.5mm ÷ 0.15)Weight:Approx.58gLayers:Single SidePanel:FR4Operating temperature:Up to 140 C or 285FDescriptionThis Single PCB Copper Clad Laminate Board is made of copper foil by the hot-pressing technology.steel-wool, Restore4, Tarn-X, roscherite, Zap or similar before using.After that be sure to rinse and dry so without any water spots.Combined …
5PCS FR4 180x120mm Single Side Copper Clad Laminate PCB Circuit Board CCLRead More
CNC Driver Control Module 5-axis MACH3 interface Board USB Engraving Machine 5 Axis with MPG Stepper Motor Motion Controller
$56.85Other Module BoardAdd to cartFeature1. Support various versions of MACH3 and support the highest version.2. Support windows XP, WIN7, WIN8, WIN10, support 64-bit system, support laptop, support tablet.3. The peripheral wide voltage input is 12-24V, and it has anti-reverse function.4. All input signals are isolated by optocoupler, which can be connected to emergency stop, tool setting, limit position and …
TB293 7W USB DC to DC 5V to 6V 9V 12V 15V Adjustable Output Converter Step Up Boost Module for LED Motor Fan
$8.73Boost & Buck ModuleAdd to cartDescriptionInput voltage:3~6VOutput voltage:6-15.5VMaximum input current:1.4ALong-term work Current:1AConversion efficiency:79-90% Input Interface:USB MaleOuput Interface:2 PIN XH2.54 Power:Maximum 7WWorking frequency:1.0MHzOperating temperature:-40 to +85 →Size:47.5 x 16mmApplications6-15V Low Power Motor6-15V LED LightingHard drive power supply9V 12V 15V Routers and network equipmentWireless communication equipment315M 433M Wireless remote controllerAttention1. Input voltage can not be greater than the maximum input range.2. Output …
150pcs 2.54mm 8 Pin IC DIP integrated Circuit Sockets Adaptor
$11.81Electronic Accessories & SuppliesAdd to cartSpecificationColor:blackQuantity:150pcsNumber of pins:8 pinsPin length:2.9mmPitch:2.54mmRow to row distance:7.62mmDimension:10 x 10 x 8mm (L x W x H)Contact termination through holeContact type dual wipe contactPackage included150 x 8 Pin IC sockets
5pcs DC 12V Battery Charging Control Board intelligent Charger Power Control Module Automatic Switch
$41.55Power Supply ModuleAdd to cartSpecificationSupply Voltage:DC 13.8-14.8VRelay Closing Voltage:DC 12.4VRelay Disconnection Voltage:DC 14.8VVoltage Tolerance:±0.1VApplication Fields:DC 12V storage batteryPotentiometer Adjustment:RP1 RP2Size:50 x 32 x 18mmSwitch:Automatic charging on or offPackage Includes5 x Battery Charging Control Module


Reviews
There are no reviews yet.