


3pcs XH-W1321 0.1 Digital thermostat Mini Embedded Red Digital Display Switch Temperature Controller with Waterproof NTC Sensor Meter
$30.89
Shipping:Standard Shipping about 10-25 business days
Secure Payment:Paypal,VISA,MasterCard
Specifications
Product Name:Miniature embedded digital display thermostat
Product Model:XH-1321
Material:ABS
Case Color:White
LED Color:Red
Input Voltage:DC12V
Temperature Measurement Range:-50-110→
Temperature Control Range:-50-110→
Control Accuracy:0.1→
Display Accuracy:0.1→
Measuring Input:NTC10K Waterproof Probe L=1 Meter
Output Type:Relay Output(Output Switch)
Output Capacity:10A
Size (Length x Width x Height):about 56 x 38 x 32mm (2.17 x 1.50 x 1.26 Inch )
Opening hole size:46 x 34mm
Key Function
SET:Press once during normal use, directly enter the stop temperature setting state, use the up and down keys to set the required stop temperature, long press to enter the internal setting menu.
UP:After long press the setting button to enter the internal setting, increase the value setting by the up button.
DOWN:After long press the setting button to enter the internal setting, use the up button to decrease the value setting.
Code:Description:Setting range (method):Factory settings
P0:Operating mode:H/C:C
P1:Backlash setting:0.1-50:2
P2:Temperature correction:-9.9~+9.9°C:0
P3:Delayed start:0-9:0
Detailed Code Descriptions
P0:Working mode:This value must be set when the thermostat is used for the first time. If it is used for heating heating, set to H, if it is used for cooling cooling, set to C.
P1:Hypothesis setting:Press and hold the setting button for 3 seconds to enter the internal menu, select P1, and press the setting button again to enter the hysteresis value setting state. The hysteresis is the difference required when the thermostat reaches the set temperature and stops working again. For example, it is set to the heating mode. When it is heated to 40 degrees, it stops at 35 degrees and starts to return. The difference is 5
P2:Temperature correction:Press and hold the setting button for 3 seconds to enter the internal menu. Press the up and down keys to select P2, press the setting button again, and set the required calibration temperature by the up and down keys. In the setting, if the detected temperature value is 0.5 °C larger than the actual temperature value, the calibration temperature to be set is -0.5 °C. If the detected temperature value is 1 °C smaller than the actual temperature value, the calibration temperature to be set is 1 °C, and the detection temperature +-calibration temperature = actual temperature.
P3:Delay start:Press and hold the setting button for 3 seconds to enter the internal menu, select P3 by the up and down keys, press the setting button again, and set the required delay time (minutes) by the up and down keys. The delay start is generally used for compressor refrigeration. If it is used in the refrigerator freezer, this value needs to be set. According to the compressor back pressure, the set value is usually 3-6 minutes, if it is not used to control the compressor or no delay. Function, skip this item directly.
Instructions
Set the difference back:Why set the backlash setting When you control the device, the temperature will rise or fall back. How many degrees does the temperature change If you want the temperature to change by 10°, the device needs to set the difference back to 10. By setting the difference back, the device can cycle through the temperature range.
Set the stop temperature:press the set button once in the normal display state to stop the temperature value flashing. You can set the desired stop temperature value by using the up and down keys.
How to set factory settings are restored:Press and hold the up and down keys while the power is on, the digital tube display 888 will then automatically jump to the detection temperature.
Heating mode setting method
Setup steps
The first step is to set P0=H
The second step sets the stop temperature
The third step sets the hysteresis value
Setting method
1. Press and hold the setting button to enter the internal menu and set P0 to H.
2. Press the setting button to stop the temperature flashing, and the up and down keys to set the temperature.
3. Press and hold the setting button to enter the internal menu and set the P1 hysteresis setting.
Use Cases
Control the water heater, heat it to 65 ° C to stop, the temperature drops back to 50 ° C and start heating again, how to set
Step 1:Determine the working mode as heating mode and set P0 to H
Step 2:Press the setting button to stop the temperature flashing. Set the starting temperature to 50 °C with the up and down keys.
The third step:stop at 65 °C, start again at 50 °C, so the return difference needs to be set to 65-50=15, enter the internal menu and set P1 to 15, the heating case is set!
Cooling mode setting mode
Setup steps
The first step is to set P0=C
The second step sets the stop temperature
The third step sets the hysteresis value
Setting method
Press and hold the setting button to enter the internal menu and set P0 to C.
Press the setting button to stop the temperature flashing, and the up and down keys to set the temperature.
Long press the setting button to enter the internal menu, set the P1 backlash setting
Use Cases
Control the farm, ventilate to 26 ° C to stop, the temperature rises to 28 ° C to start the refrigeration again, how to set up
The first step:determine the working mode is cooling mode, set P0 to C
Step 2:Press the SET button to stop the temperature flashing. Set the stop temperature to 28 °C with the up and down keys.
The third step:stop at 26 ° C, start again at 28 ° C, so the return difference needs to be set to 28-26 = 2, enter the internal menu to set P1 to 2, the cooling case is set!
Package includes
3 x Miniature embedded digital display thermostat
| Weight | 0.138 kg |
|---|
Related products
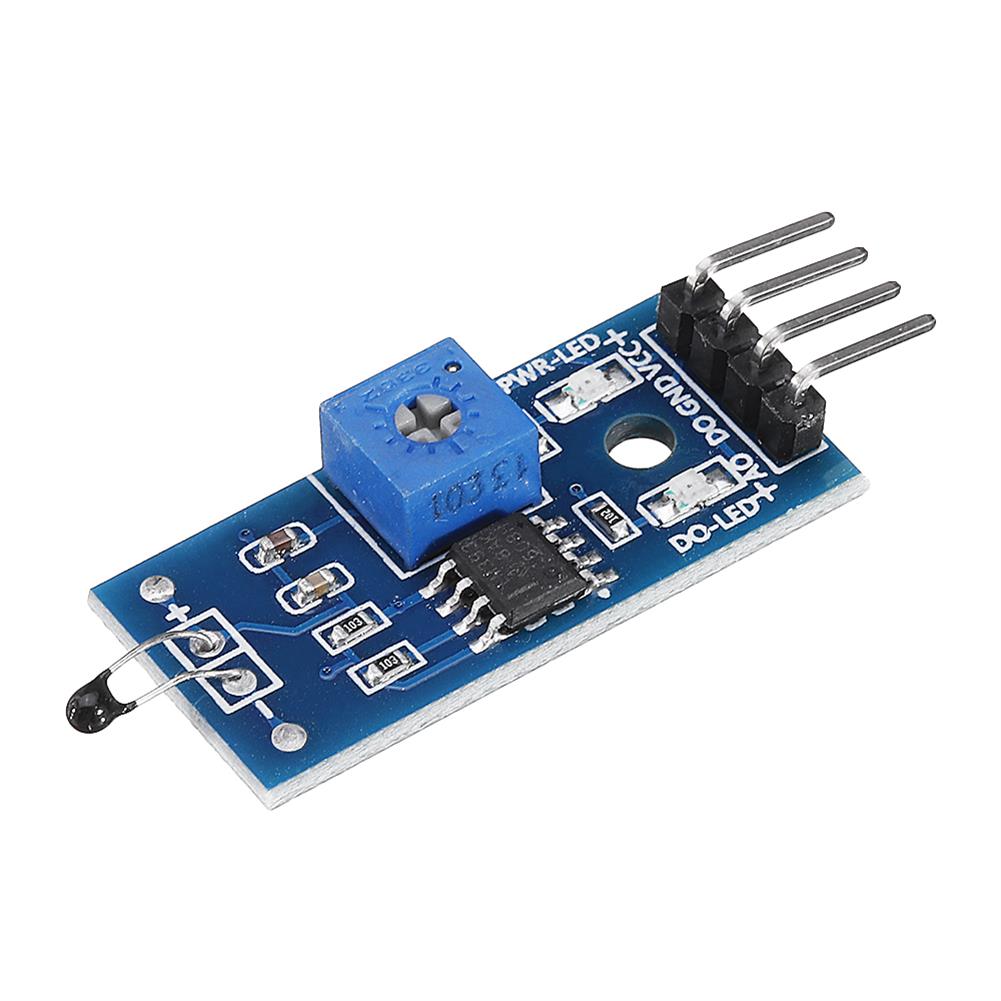
50pcs thermal Sensor Module Temperature Switch thermistor Sensor Board
$44.79Sensor & Detector ModuleAdd to cartUsesTemperature detection, temperature control sensors , ambient temperature detectionFeatures1. Using the NTC thermistor sensor, good sensitivity2. The comparator output signal is clean, good waveform, driving ability, more than 15mA.3. Adjust the temperature distribution position detection threshold4. The working voltage 3.3V-5V5. The output format:digital switching outputs ( 0 and 1 )6. Fixed bolt holes for easy …
50pcs thermal Sensor Module Temperature Switch thermistor Sensor BoardRead More
Waterproof Ultrasonic Sensor Module integrated Ranging Sensor Reversing Radar Measuring Distance
$24.04Sensor & Detector ModuleAdd to cartThis module is easy to use. A control port sends a high level above 10US, so you can wait for the high level output at the receiving port. You can turn on the timer when there is an output. When this port goes low, you can read it. The value of the timer, at this …
30pcs thermal Sensor Module Temperature Switch thermistor Sensor Board
$27.45Sensor & Detector ModuleAdd to cartUsesTemperature detection, temperature control sensors , ambient temperature detectionFeatures1. Using the NTC thermistor sensor, good sensitivity2. The comparator output signal is clean, good waveform, driving ability, more than 15mA.3. Adjust the temperature distribution position detection threshold4. The working voltage 3.3V-5V5. The output format:digital switching outputs ( 0 and 1 )6. Fixed bolt holes for easy …
30pcs thermal Sensor Module Temperature Switch thermistor Sensor BoardRead More
thermal Sensor Module Temperature Switch thermistor Sensor Board
$4.36Sensor & Detector ModuleAdd to cartUsesTemperature detection, temperature control sensors , ambient temperature detectionFeatures1. Using the NTC thermistor sensor, good sensitivity2. The comparator output signal is clean, good waveform, driving ability, more than 15mA.3. Adjust the temperature distribution position detection threshold4. The working voltage 3.3V-5V5. The output format:digital switching outputs ( 0 and 1 )6. Fixed bolt holes for easy …
thermal Sensor Module Temperature Switch thermistor Sensor BoardRead More


Customers Also Viewed
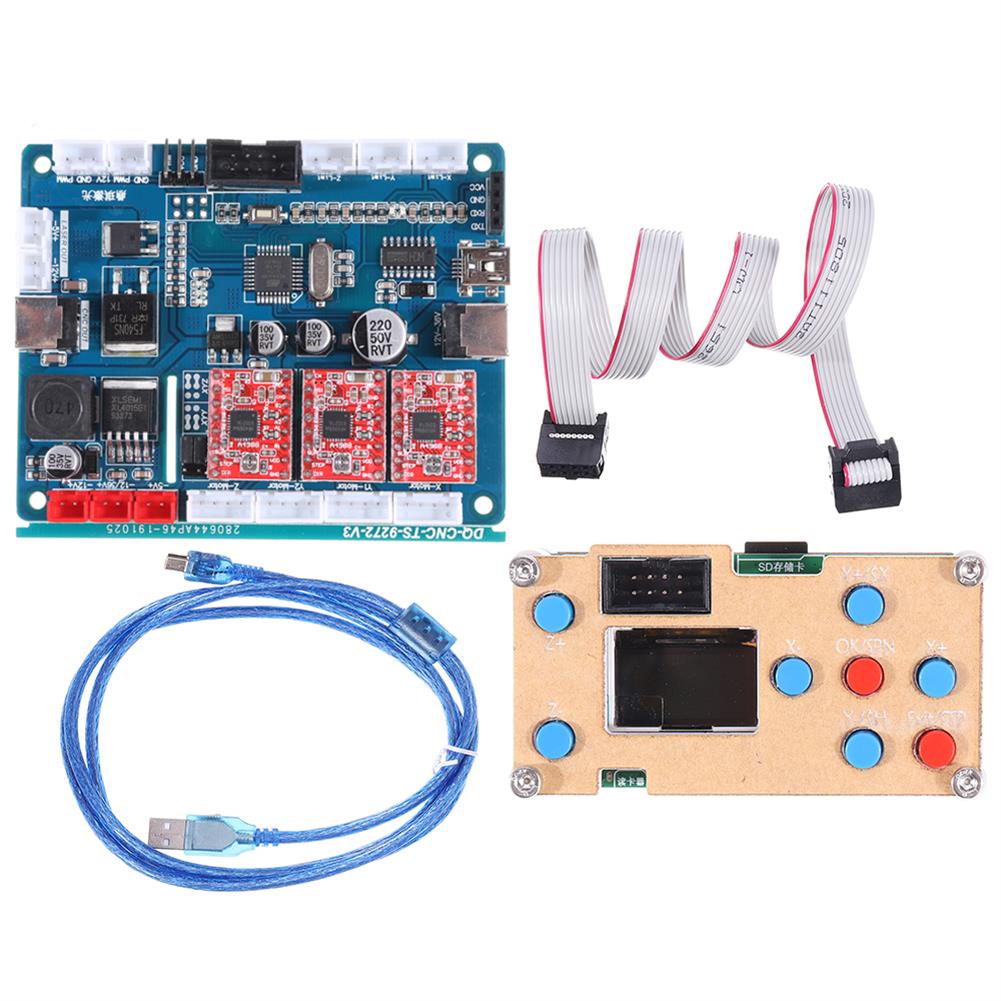
3 Axis GRBL USB Driver offline Controller Control Module LCD Screen w/ Controller Board SD Card for CNC 1610 2418 3018 Wood Router Laser Engraving Machine
$93.14Control BoardAdd to cartDescriptionThis offline controller w/ controller board is designed for the use of Mini CNC router 1610/2418/3018 and even with more advanced function of tool set, limit switch supportive, Laser supportive; Offline and Bluetooth supportive.SpecificationUSB Cable Length:20cmFirmware:GRBL 08, 09, 1.1 and so on Input Voltage:DC 7V- 36VApplicable CNC Router:3 Axis CNC router 1610; 2418; 3018Features1. Support …
20Pcs PS2 Game Joystick Switch Sensor Module
$34.87Other Module BoardAdd to cart20Pcs PS2 Game Joystick Module For Description This is PS2 game joystick module for Lots of robot projects need joystick. This module provides a affordable solution to that. Simply connect to two analog inputs, the robot is at your commands with X,Y control. It also has a switch that is connected to a digital pin. …
Ebyte E07-M1101D-TH 10dBm Spring Antenna 433MHz CC1101 Wireless Transceiver SPI 433mhz RF Module
$9.18Smart ModuleAdd to cartSpecificationsInterface:SPIPower:10dBmDistance:520mSupply voltage:1.9 ~ 3.6V DCFrequency:433MHz(387 ~ 464MHz)RF Parameter:Value:RemarkWorking frequency:387~464 MHz:Default:433MHz (26MHz oscillator)Transmitting power:10 dBm:Max. Power (10mW)Receiving sensitivity:-108 dBm:Air data rate:0.6kbpsAir data rate:0.6k~500kbps:Default:0.6kbpsTest distance:600m:In open and clear air, with maximum power, 5dBi antenna gain, height of 2m, air data rate:0.6kbpsHardware Parameter:Value:RemarkSize15 * 30 mm Without Spring antennaAntenna typeSpring antenna Communication interfaceSPI PackageDIP Electronic parameter:Min.:Typ.:Max.:Unit:ConditionPower supply:1.8:3.3:3.6:VCommunication level:1.8:3.3:3.6:VTransmitting …
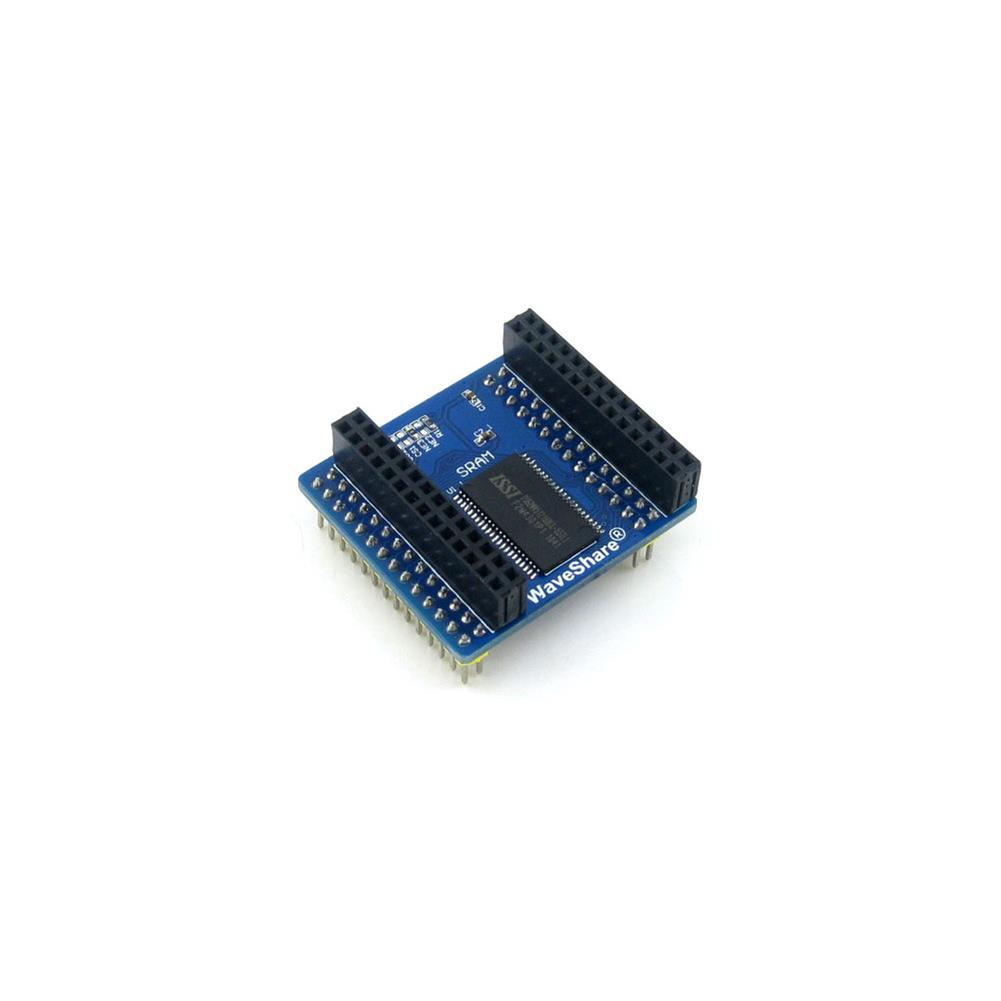
Waveshare IS62WV51216BLL SRAM RAM Module Storage Memory Board
$28.42Expansion Board & ShieldAdd to cartFeatureFunction:SRAM IS62WV51216BLL (8M Bit), can be directly connected to the corresponding FSMC interface of the Open series development board, and the external expansion interface supports external expansion of SRAM, LAN, USB HOST, etc.Typical application:SRAM external expansion storageMain resources:IS62WV51216BLL (8M Bit), control interfacePackage includes1 x IS62WV51216BLL SRAM Board
3 Megapixel Optical Zoom Cam Module Fixed Focus 3MP OV3660 Camera Module FOV 79
$15.30Other Module BoardAdd to cart>>>Manual:Click here to openSpecificationsModel No.:HBVCAM-3M1917Model Size:30mm ≠ 25mm ≠ 5.0mm÷0.2MMTemperature (Operation):-30C to 70CTemperature (Stable Image):0C to 50CAssembly technique:SMT (ROSH)Focus:FixedObject distance:30CM-infinityResolution:800LW/PH (Center)PCB printing ink:Blackinterface:USB 2.0Power supply:USB bus powersupply voltage:DC 5V÷5%Maximum Power consumption:600WOperating system request:Win XP/win 7,8 / vista /android 4.0/ mac /Linuxwith uvc Sensor:OV3660 (1/5” )Seneor Package:CSP,Bare DieMaximum resolution:2048*1536Sensitivity:670mV /(lux-sec)Pixel Size:1.4┢m x 1.4┢m Maximum Image Transfer …
3 Megapixel Optical Zoom Cam Module Fixed Focus 3MP OV3660 Camera Module FOV 79Read More
Hall Effect Magnetic Sensor Module DC 5V
$4.36Sensor & Detector ModuleAdd to cartDescription This is Hall Effect magnetic sensor module DC 5V for Brand:KEYES Model:KY-003 Magnetic, speed, gap induction Suitable for DIY project Working voltage:DC 5V Material:PCB Feature Small size and high sensitivity. response temperature and good performance. Precision and high reliability 3144 Series Hall principle of Hall effect switch IC, using technology to produce magnetic semiconductor …
Geekcreit Portable Mini Automatic Spot Welding Machine Control Board 12V/5.6V Portable Lithium Battery Spot Welding Circuit Board Accessories
$40.49Driver ModuleAdd to cartInstructions for use of automatic spot welding control board1. Power requirements:In 12V mode, voltage input is 7-15V (12V recommended), in 5.6V capacitor mode, voltage supports 3.7-6V (recommended 5.6V), current requirements:can output actual current 120-360A2. Button function:switch between 1 power level-2 power level-3 power level-4 power level after long press for 3 seconds3. The red light …


Reviews
There are no reviews yet.